Sonicboom is a fully 3d-printed, open source bluetooth speaker that uses common off-the-shelf hardware.
To make it yourself, you need:
- A 3d printer capable of printing up to 200mm x 200mm x 30mm.
- Approximately 800g of 3D printing filament.
- The 3D schematics.
- A 6 1/2 inch full range car speaker. You can use other sizes if you modify the 3d model.
- An amplifier and bluetooth receiver that matches your speaker.
- 20cm of speaker cable.
- Glue suitable for sticking plastic together.
- Vinyl Wrap.
- Fabric to cover the speaker grille.
- A power supply for the amplifier, if your amplifier doesn't come with one.
- Some clamps to hold the speaker together while gluing. They should be able to expand to 210mm.
- Optionally, a 3.5mm extension cable (30cm in length is plenty).
- Blender if you want to modify the 3D files.
Choosing a Speaker Driver
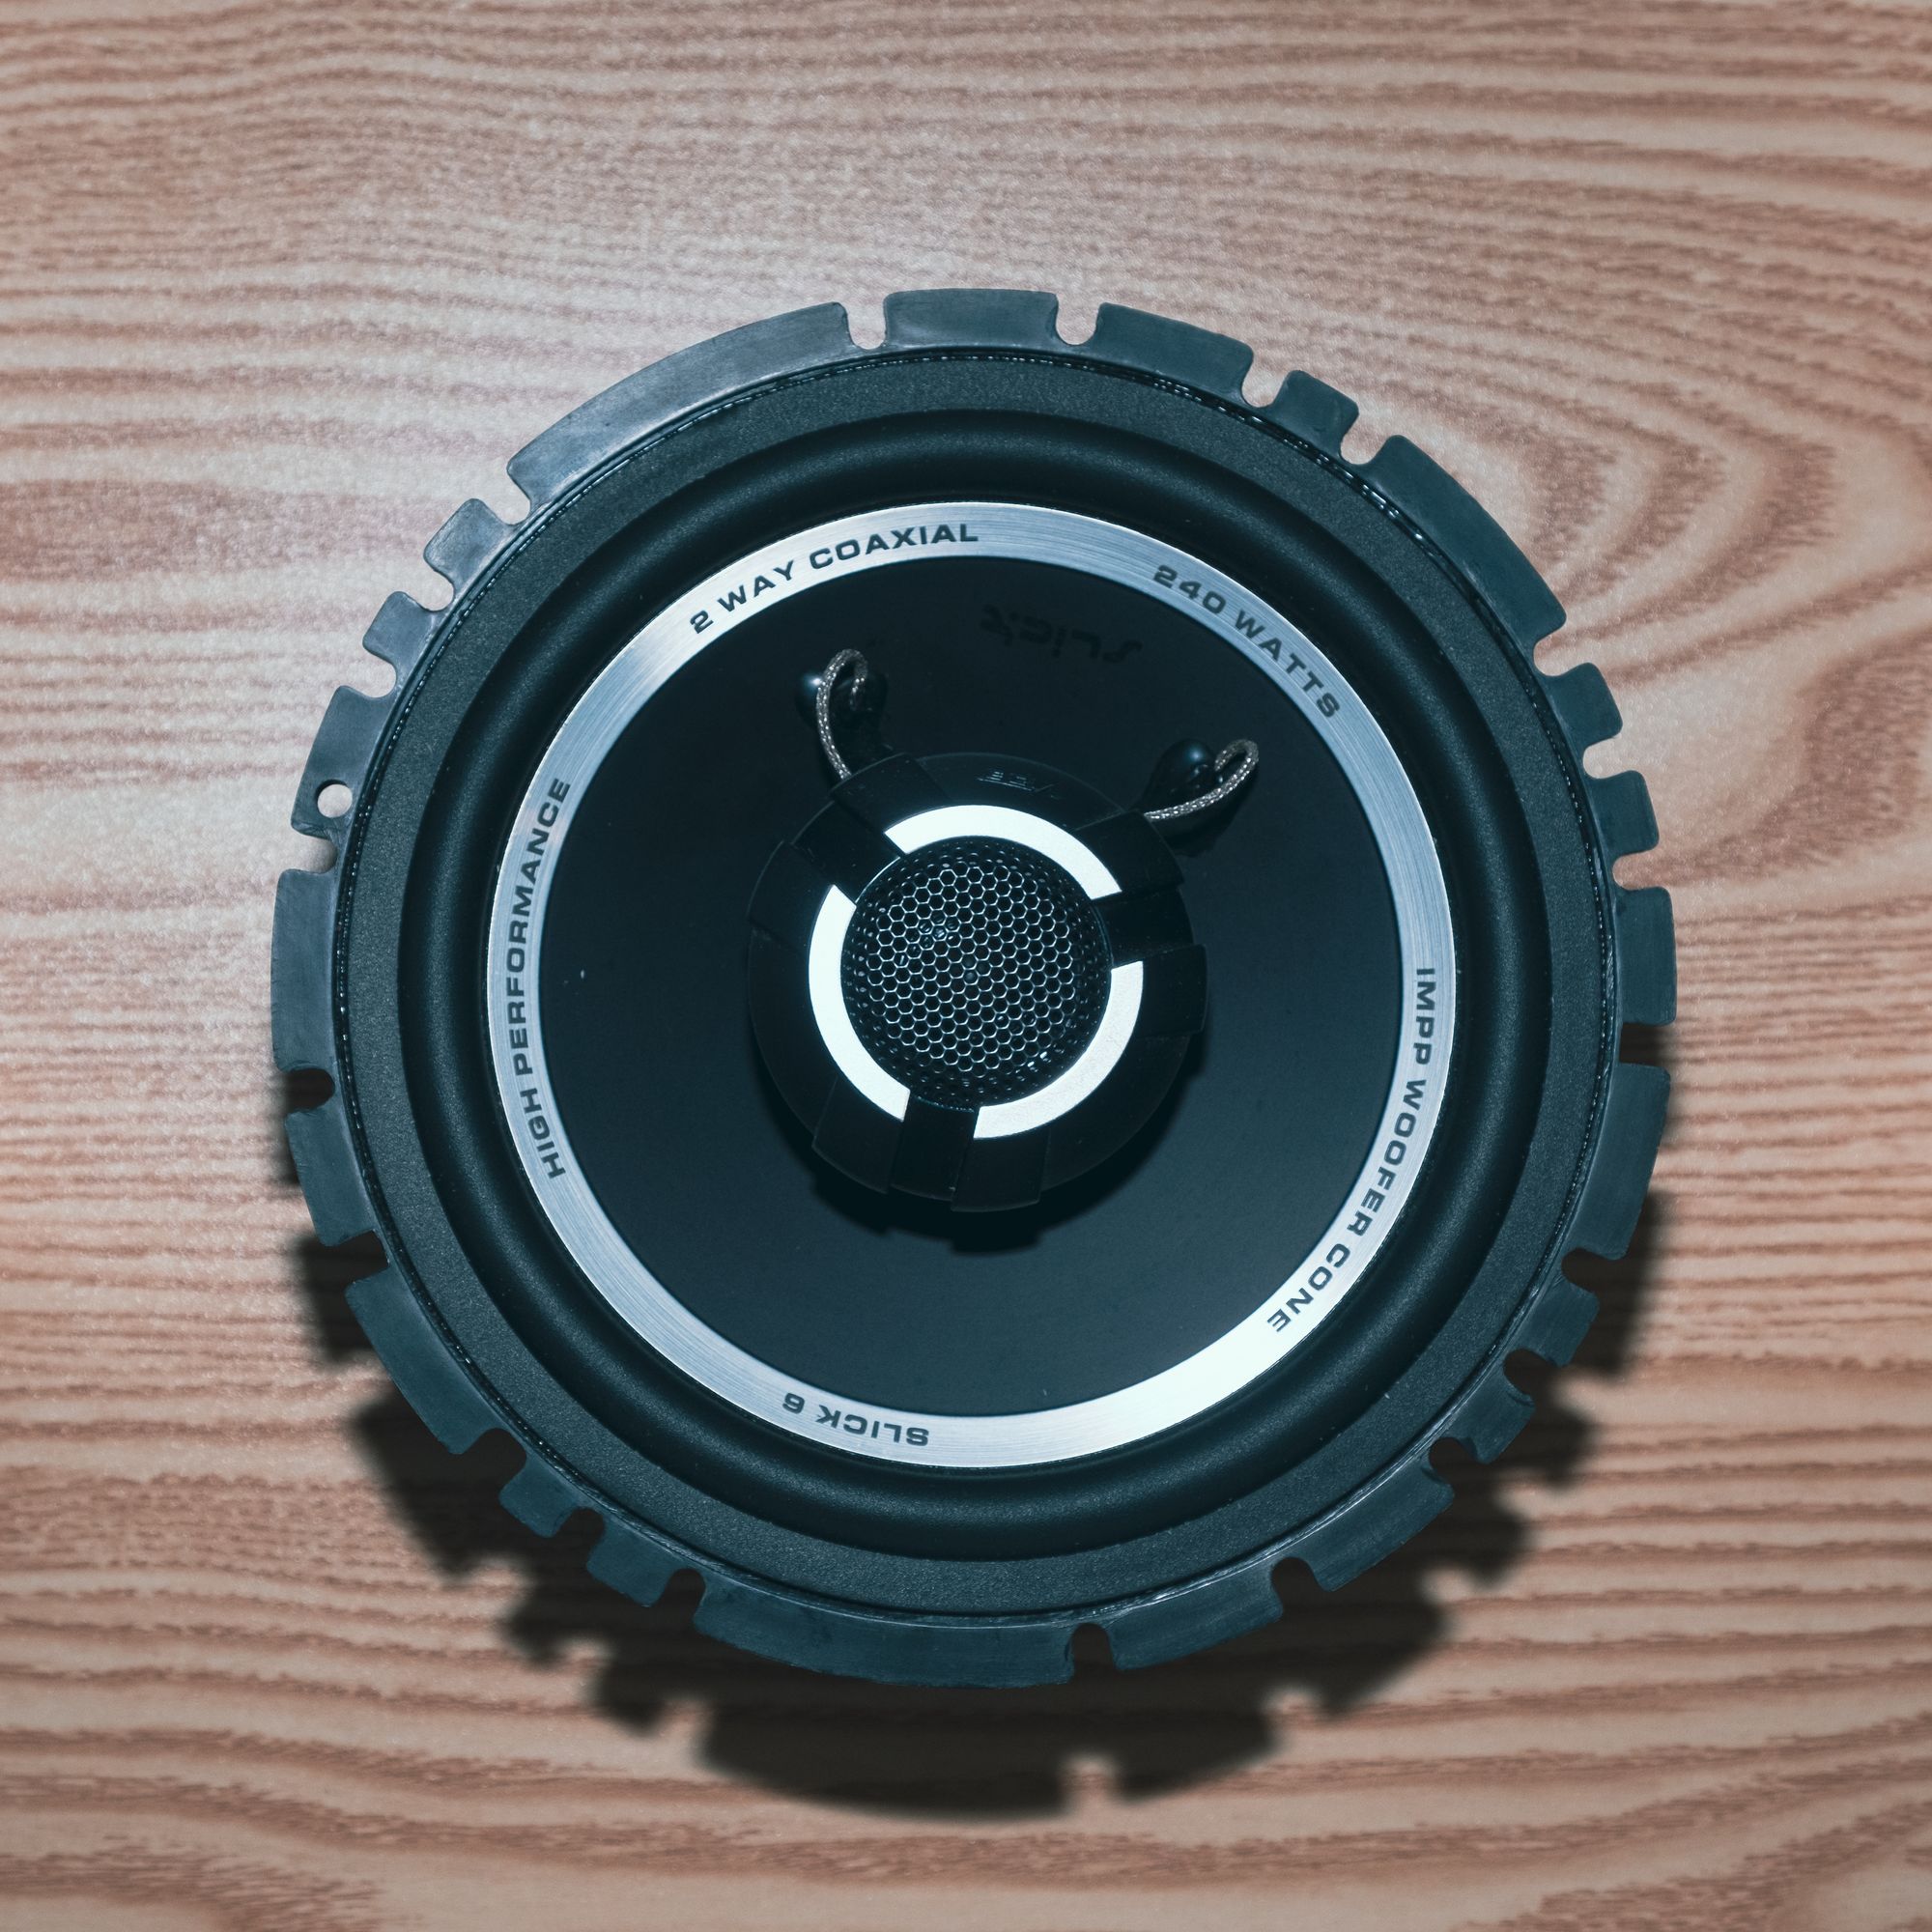
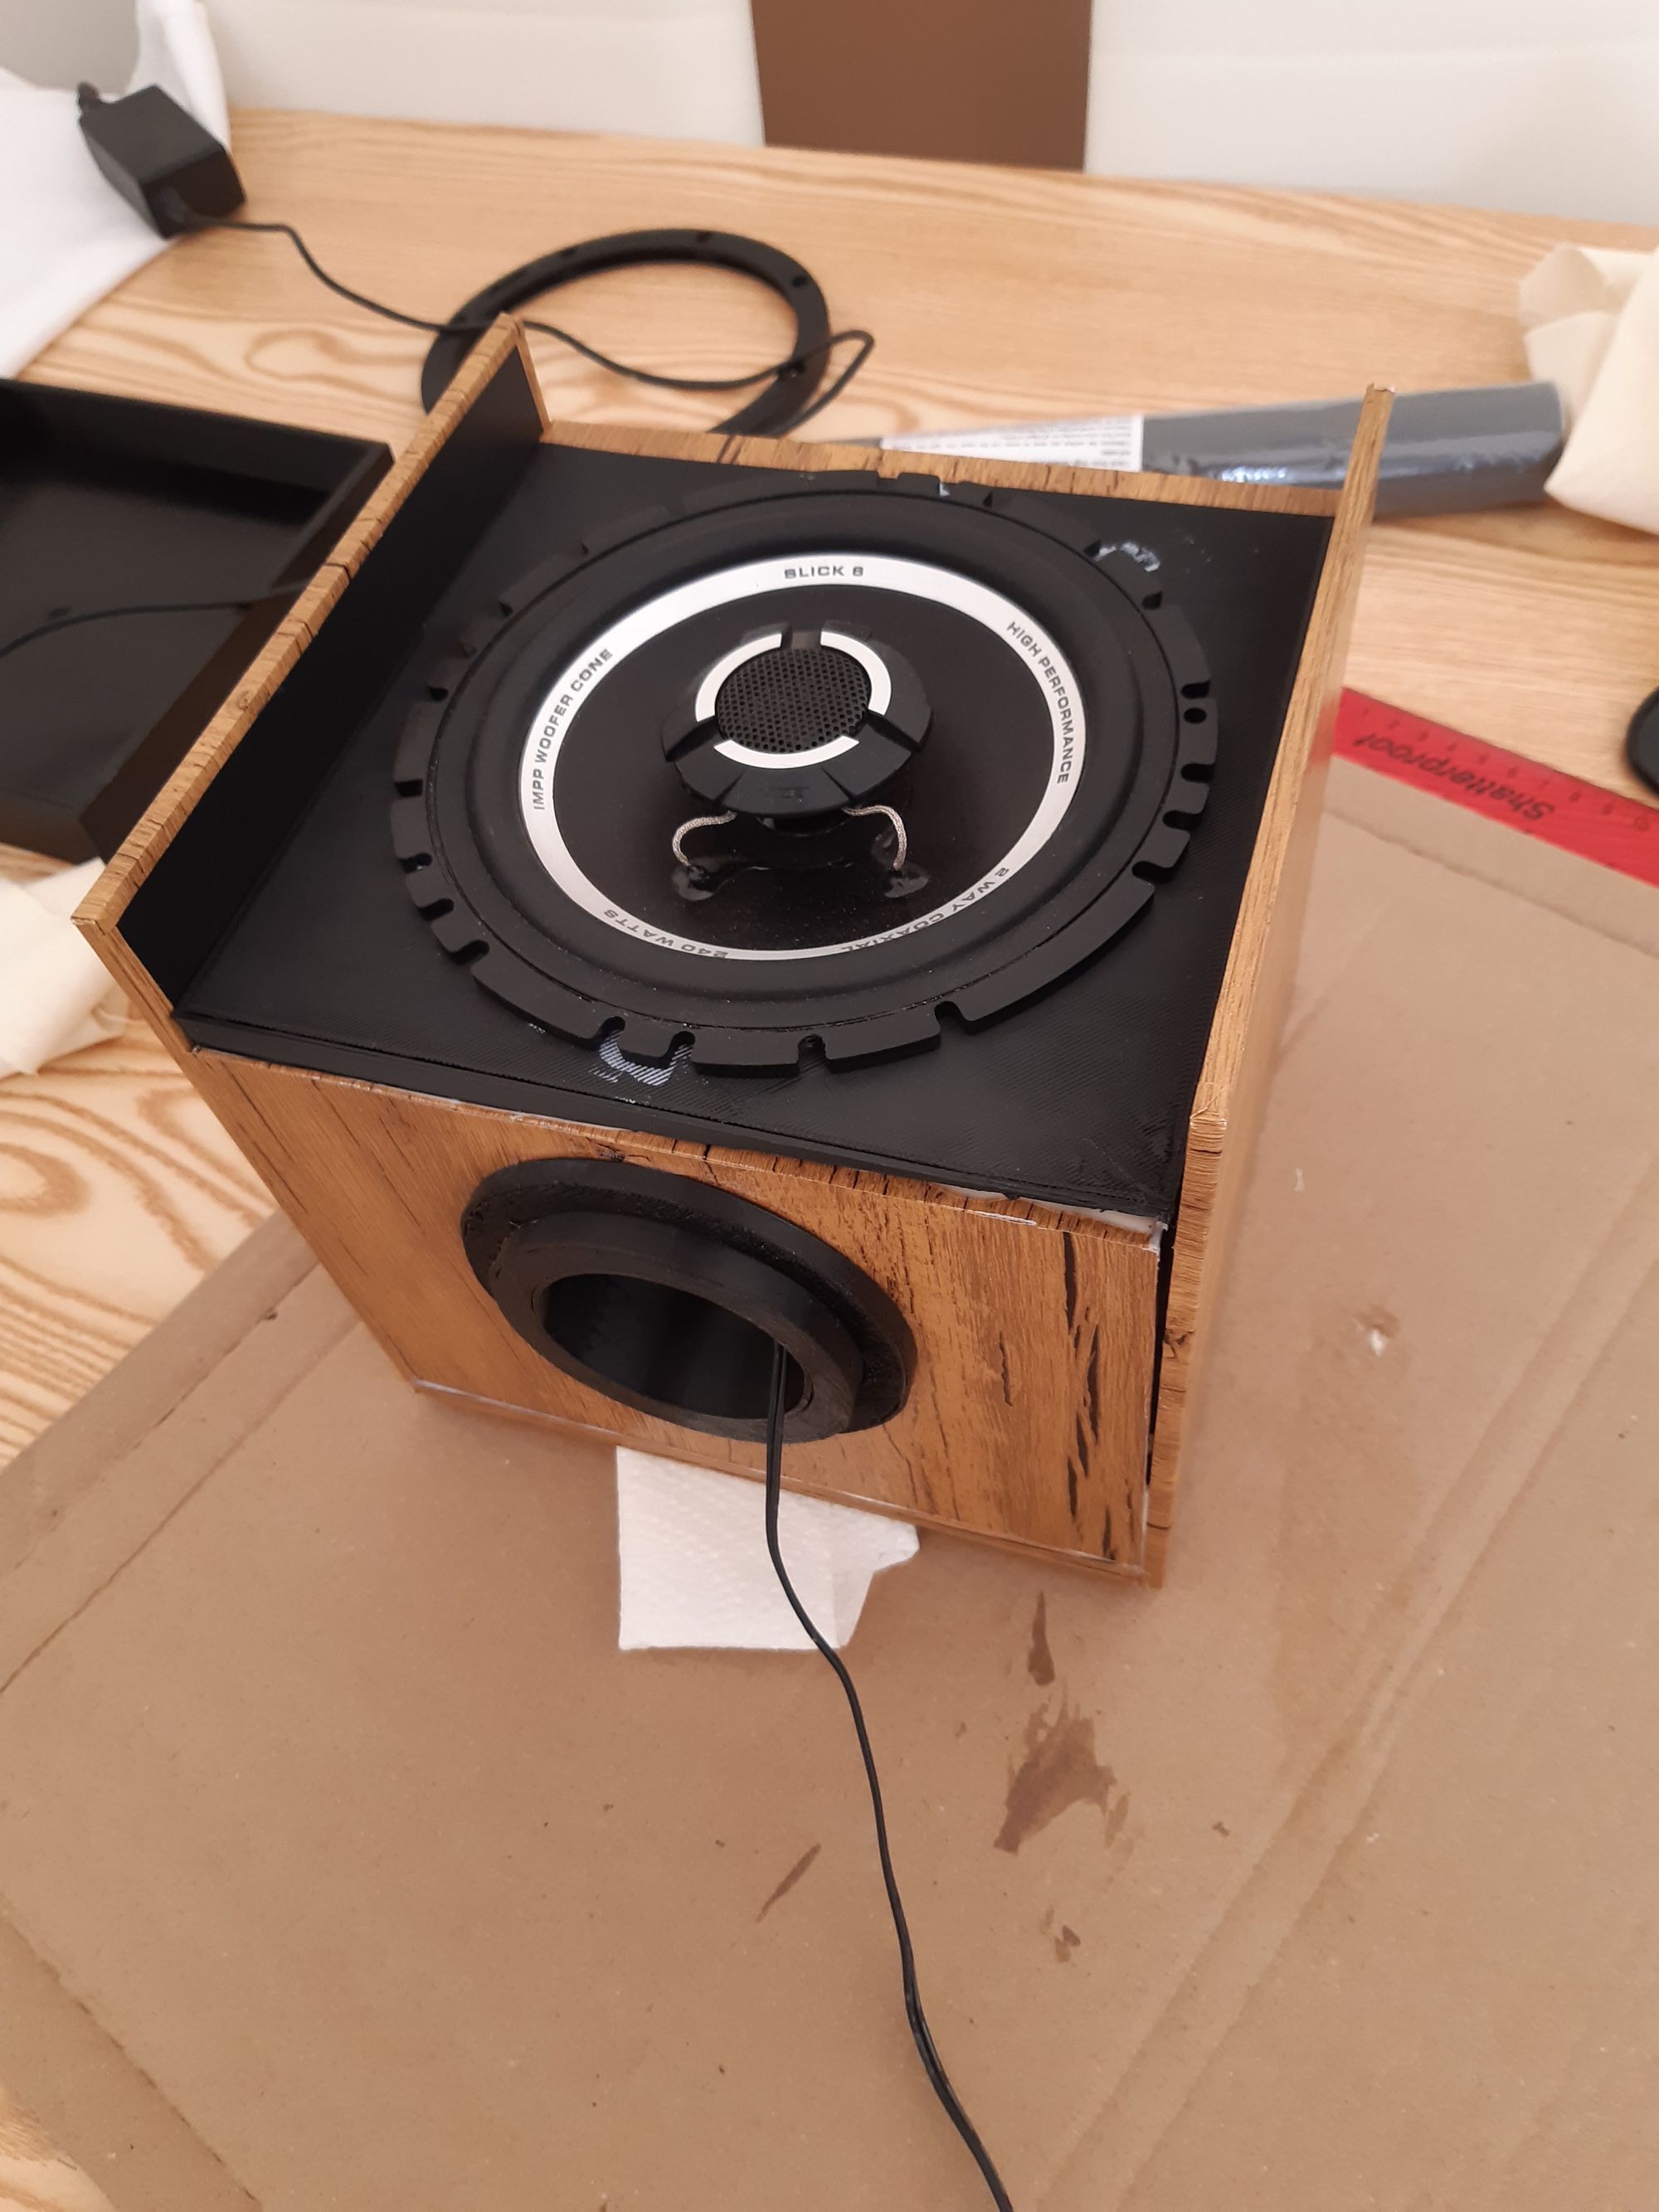
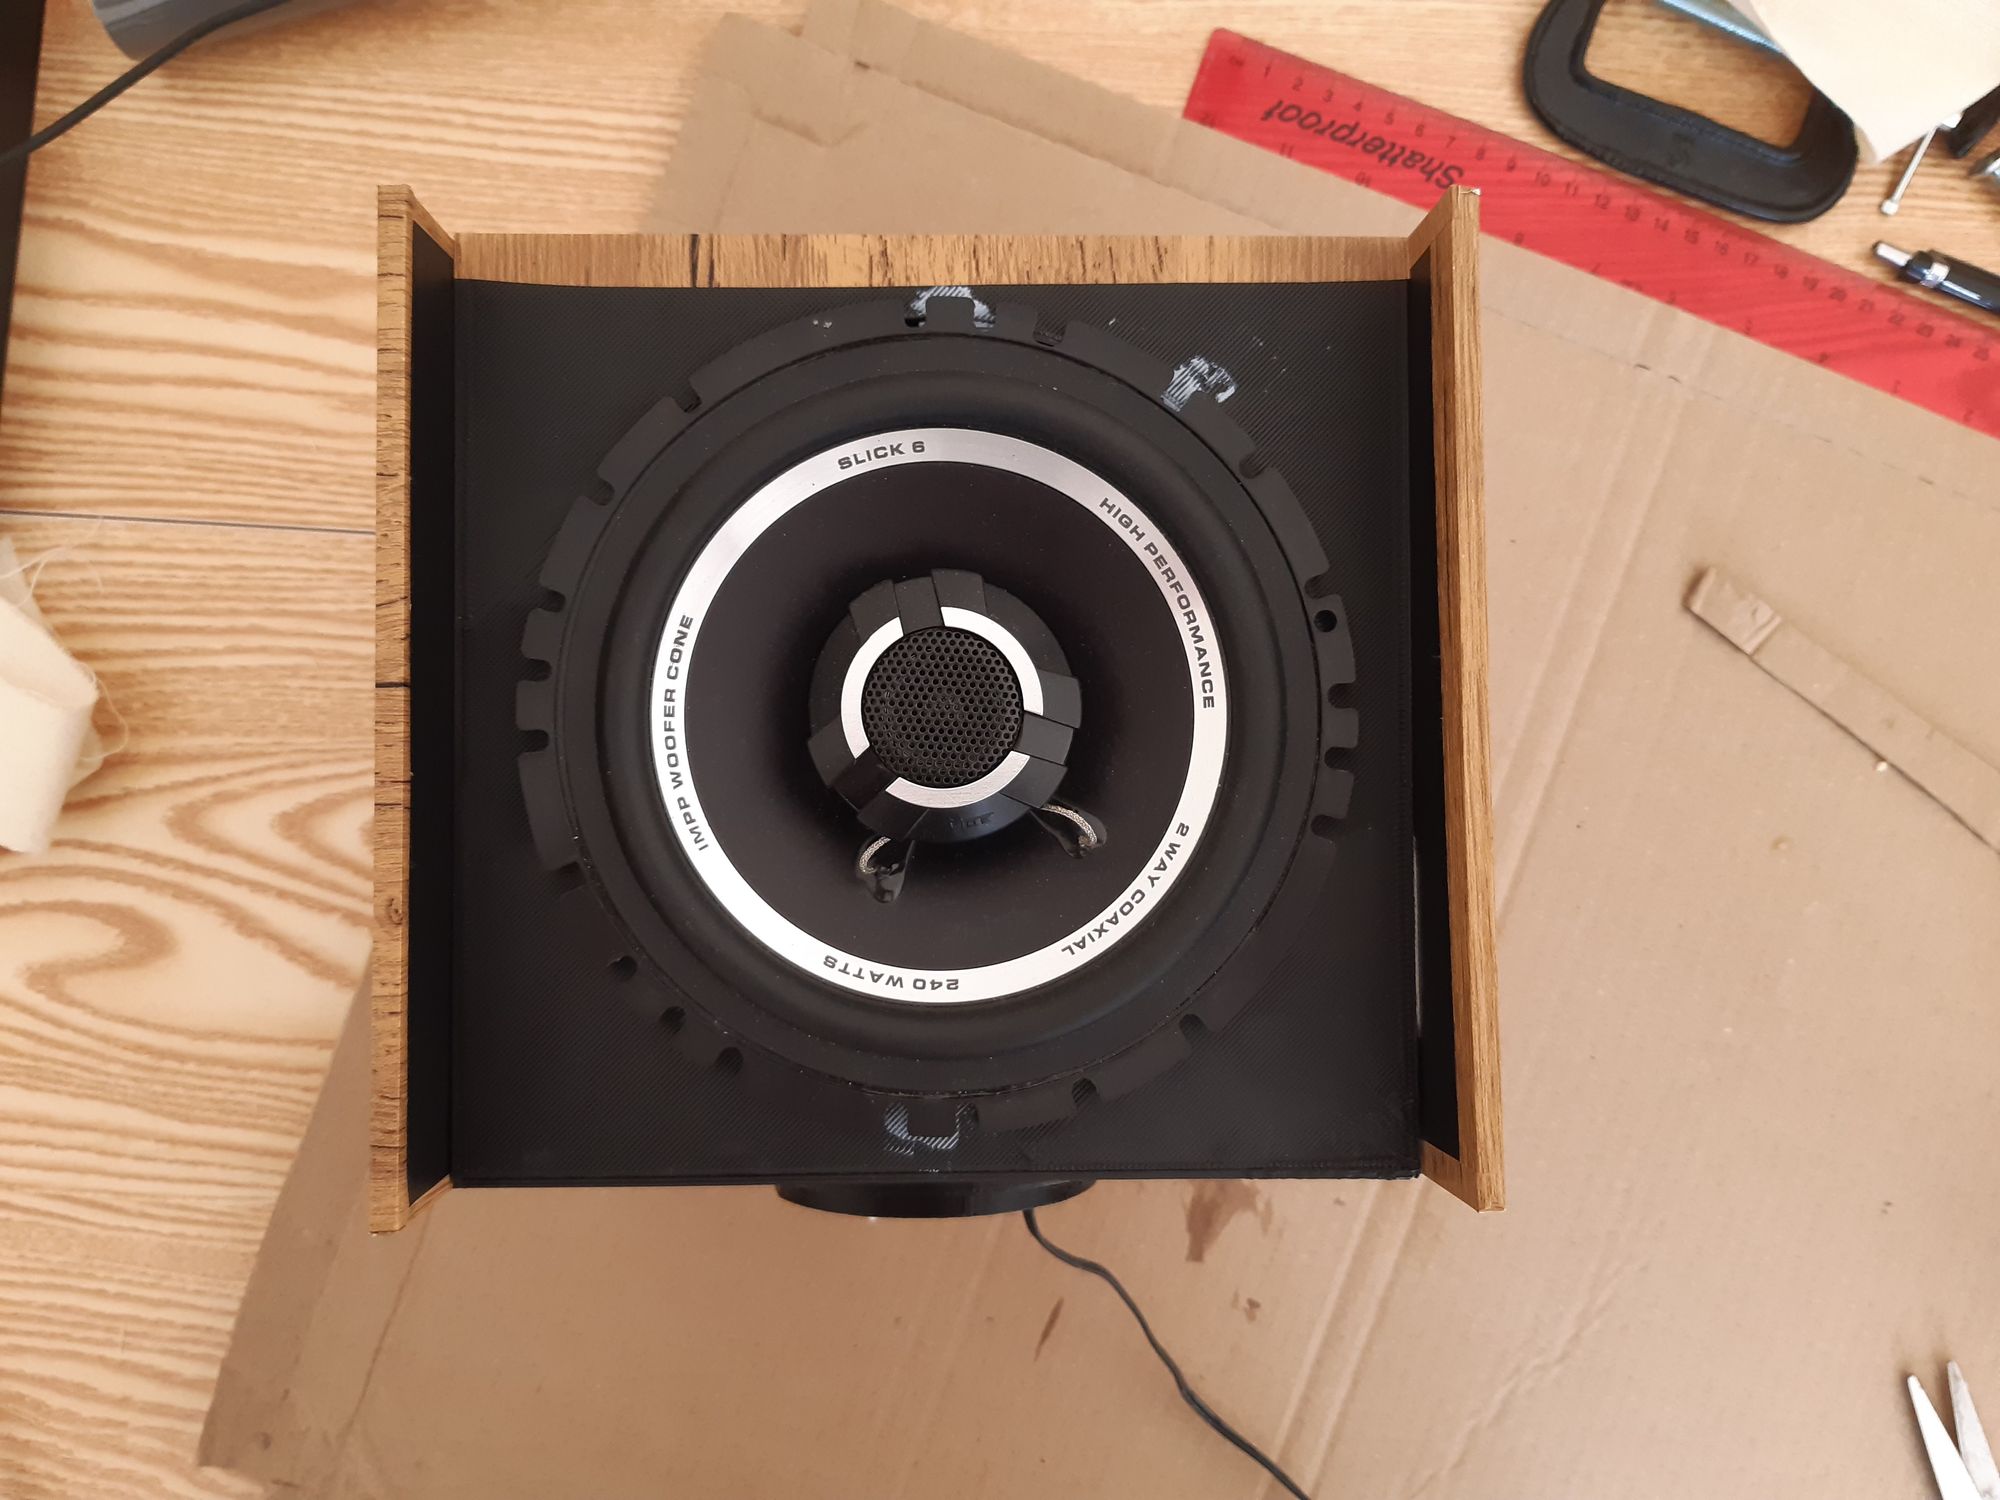
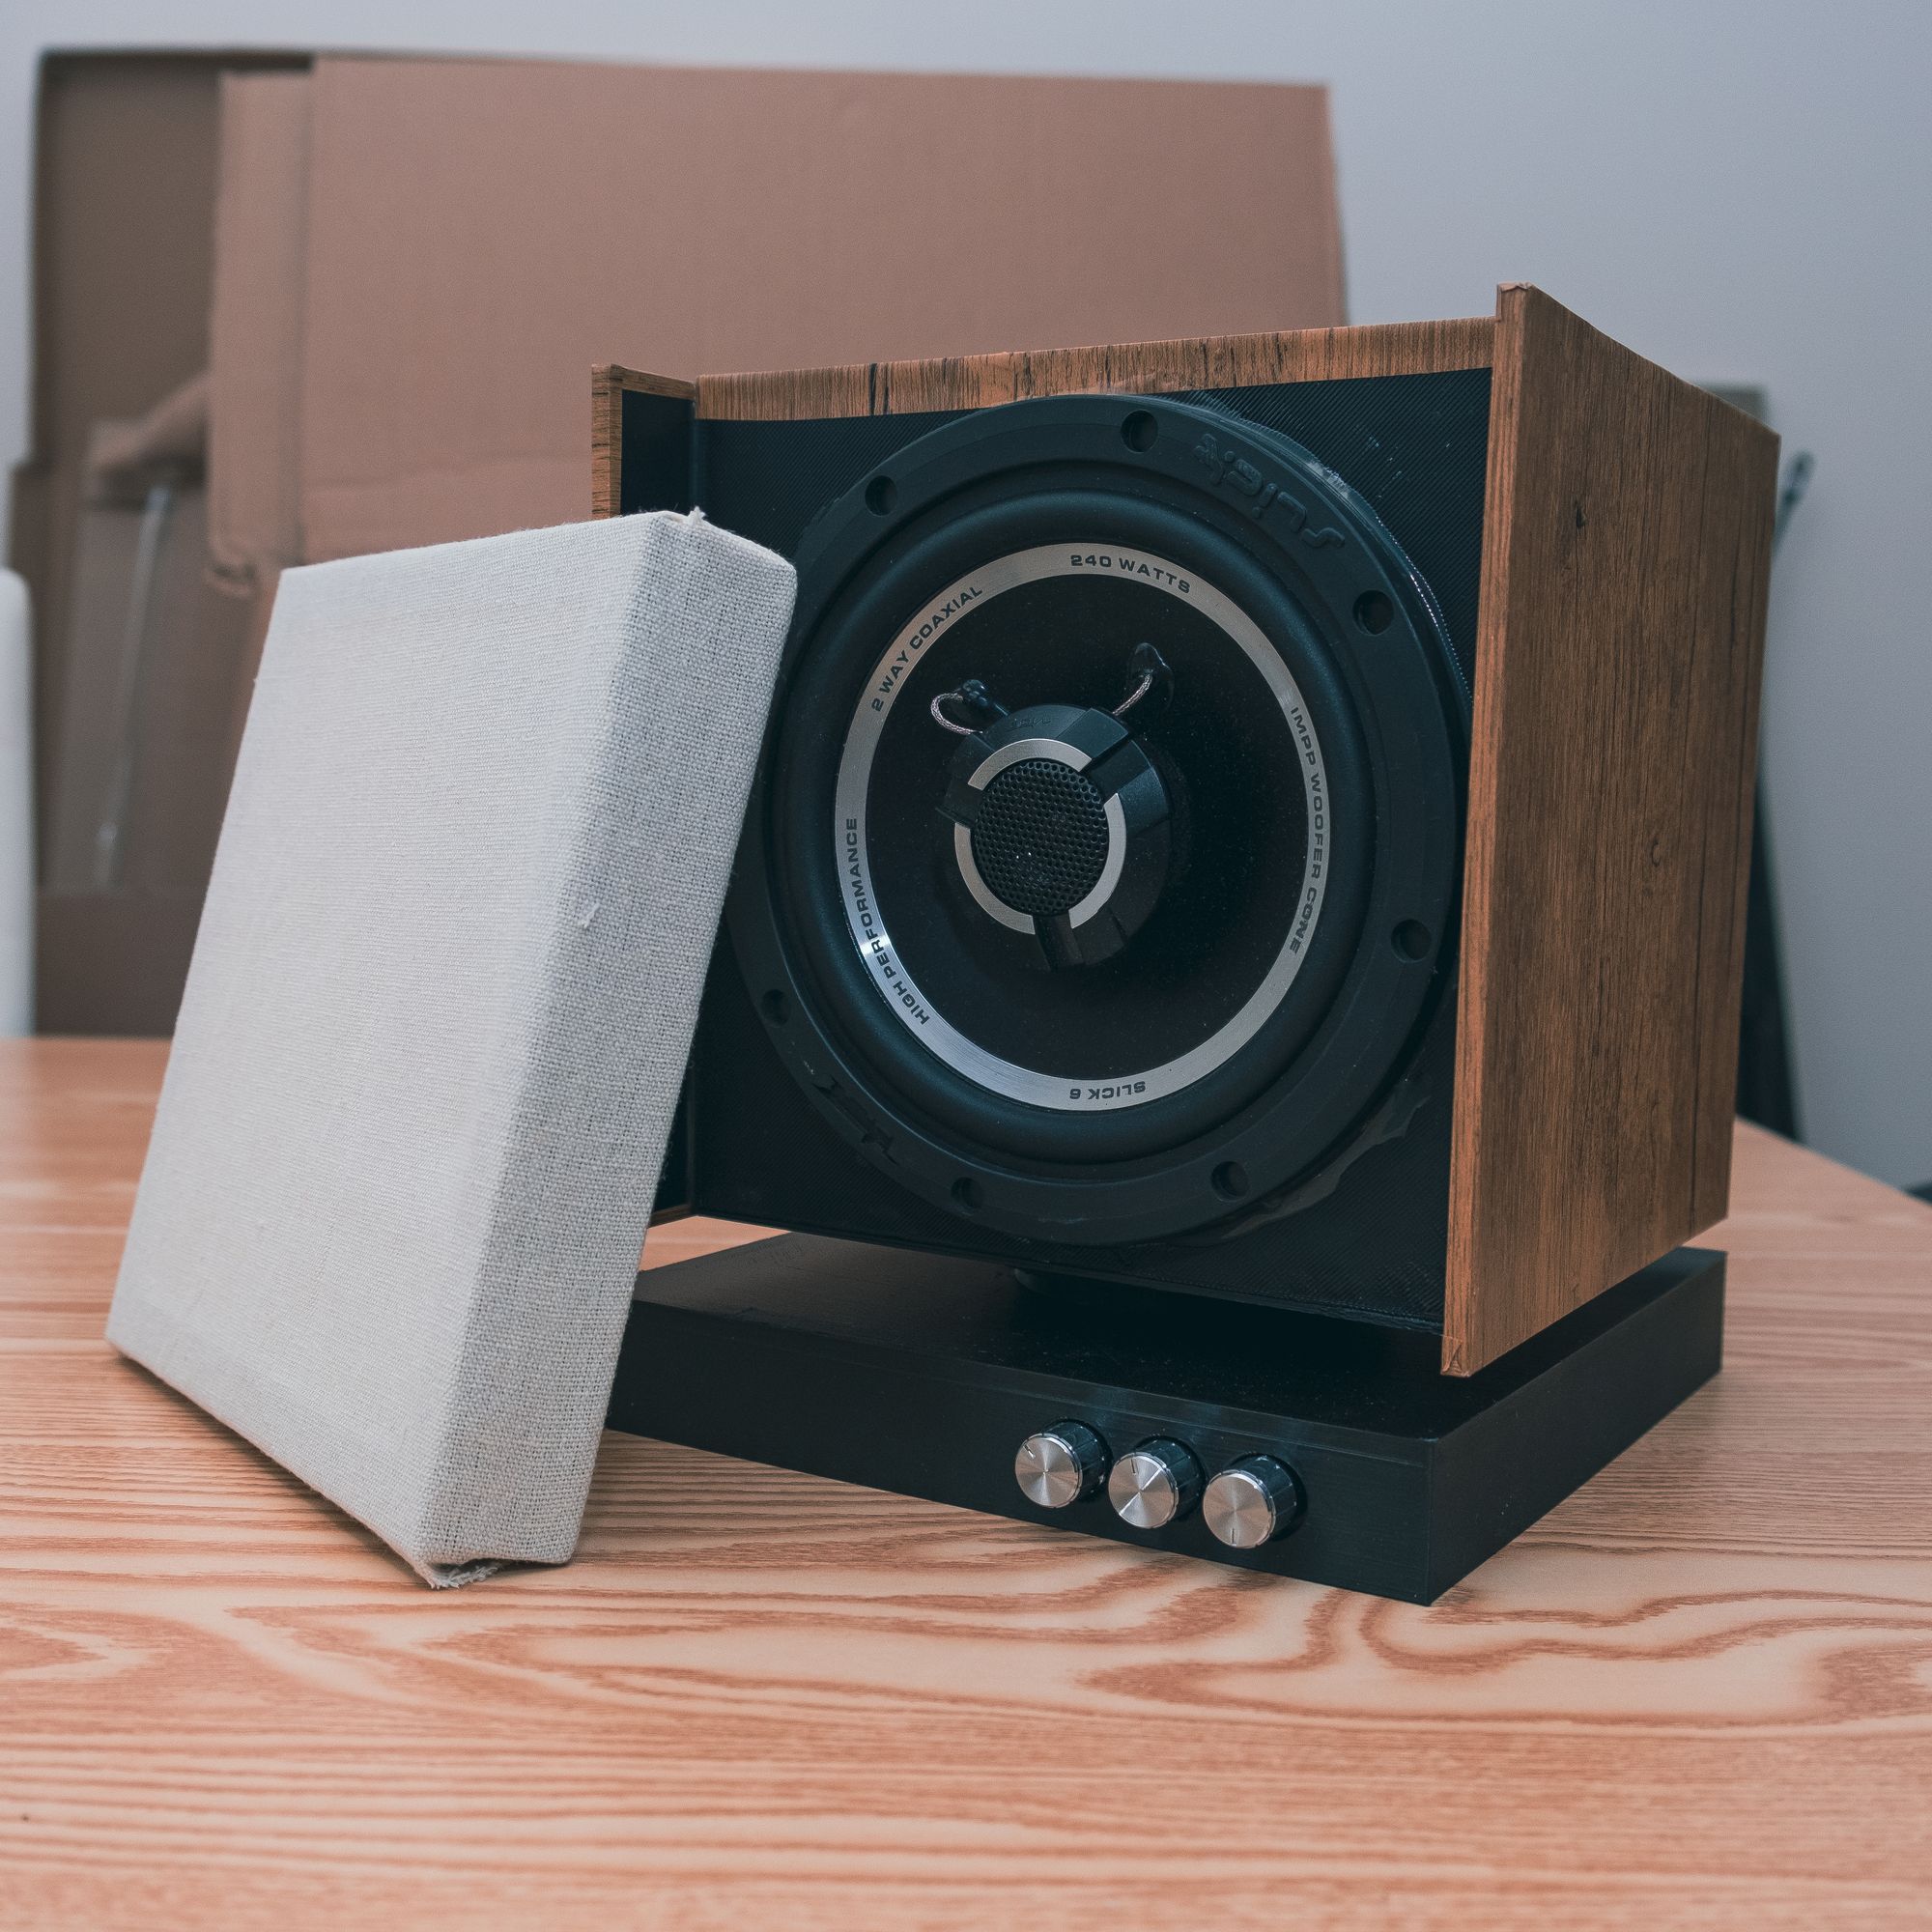
For the speaker, I used an old Vibe Slick 6 car speaker. Any circular 6 1/2 inch speaker should fit the mounting plate without modification, but you should double-check the measurements. The speaker should be able to rest on top of the Speaker Mounting Plate. Ensure that the speaker has both a woofer and a tweeter, as some car speakers have these in separate units.
I also recommend not having a speaker driver heavier than the one I used (676 grams). The speaker enclosure will become too front-heavy and may be unbalanced!
Choosing an Amplifier/Bluetooth Receiver
Check the recommended wattage and resistance of the speaker you're using and pick an amplifier that will be able to drive it. I picked this one, which also allows you to adjust the treble and bass. This one doesn't come with a power supply. I used an old laptop power supply that provides 3 amps at 20 volts which is within the specs of this amplifier and provides plenty of power and good volume.
Instructions
Step 1: Modify the pieces, if necessary
The first step is to produce the pieces of the speaker enclosure using a 3D printer. Sonicboom has been designed for 6 1/2 inch circular speaker drivers like you might find in a car. If you are using a different sized speaker or a different amplifier, you may need to make some modifications to the 3D schematics.
Modifying the Speaker Mounting Plate
If you are using a different size or shape speaker driver, you may need to modify the 3D schematics for the speaker mounting plate.

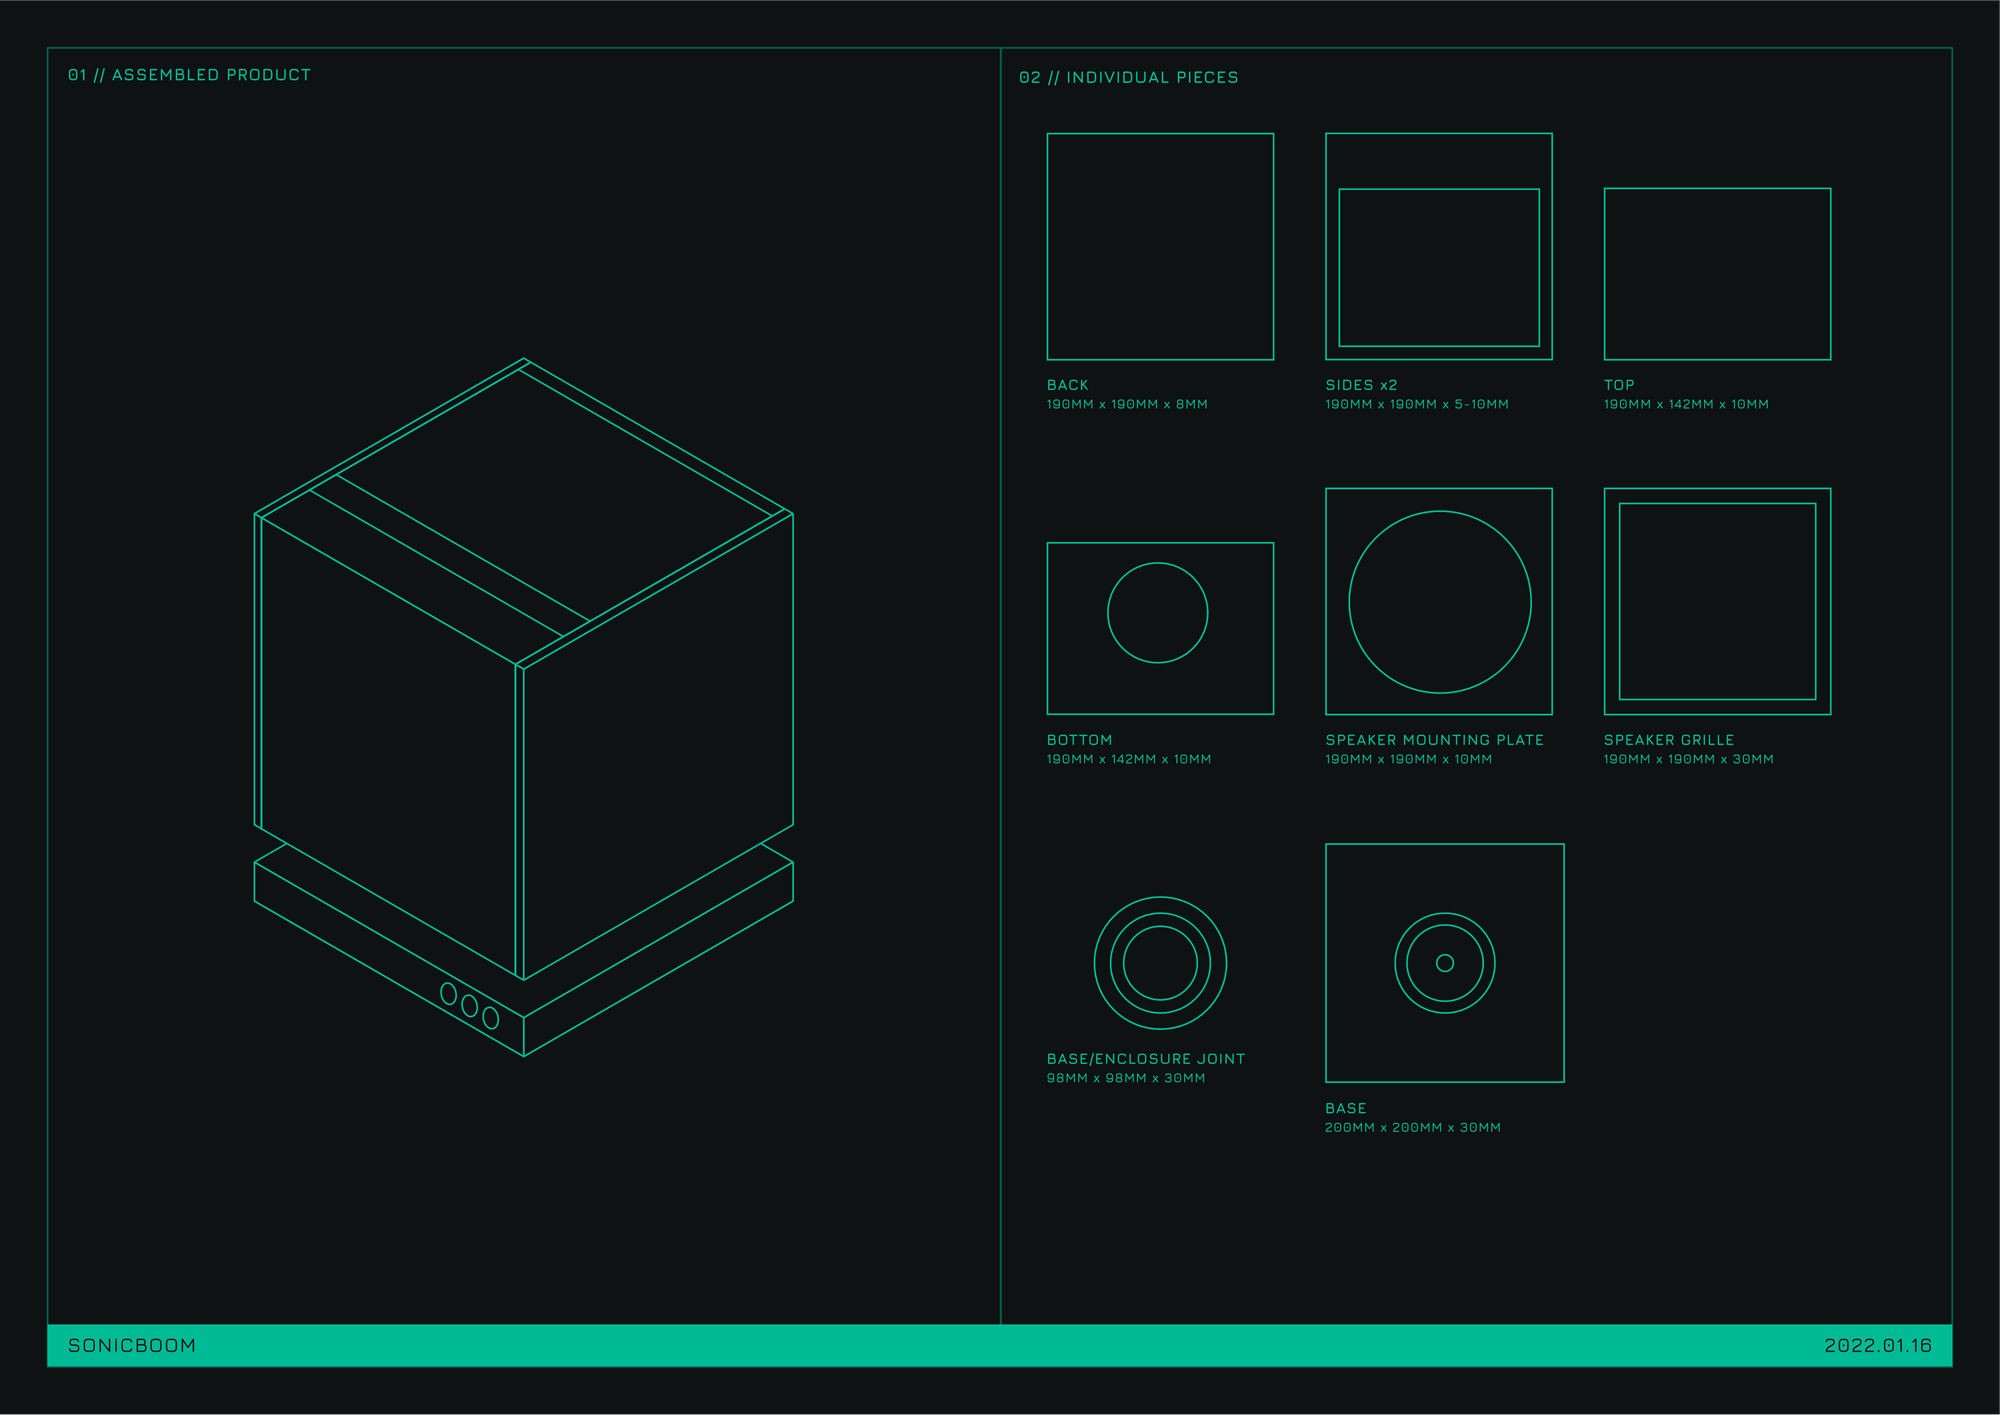
The most important thing is to keep the outermost dimensions at 190mm x 190mm x 10mm. Otherwise, the inside of the speaker mounting plate can be cut-out to fit any size or shape of speaker you desire. Just make sure you have enough surface area to glue the speaker to the mounting plate.
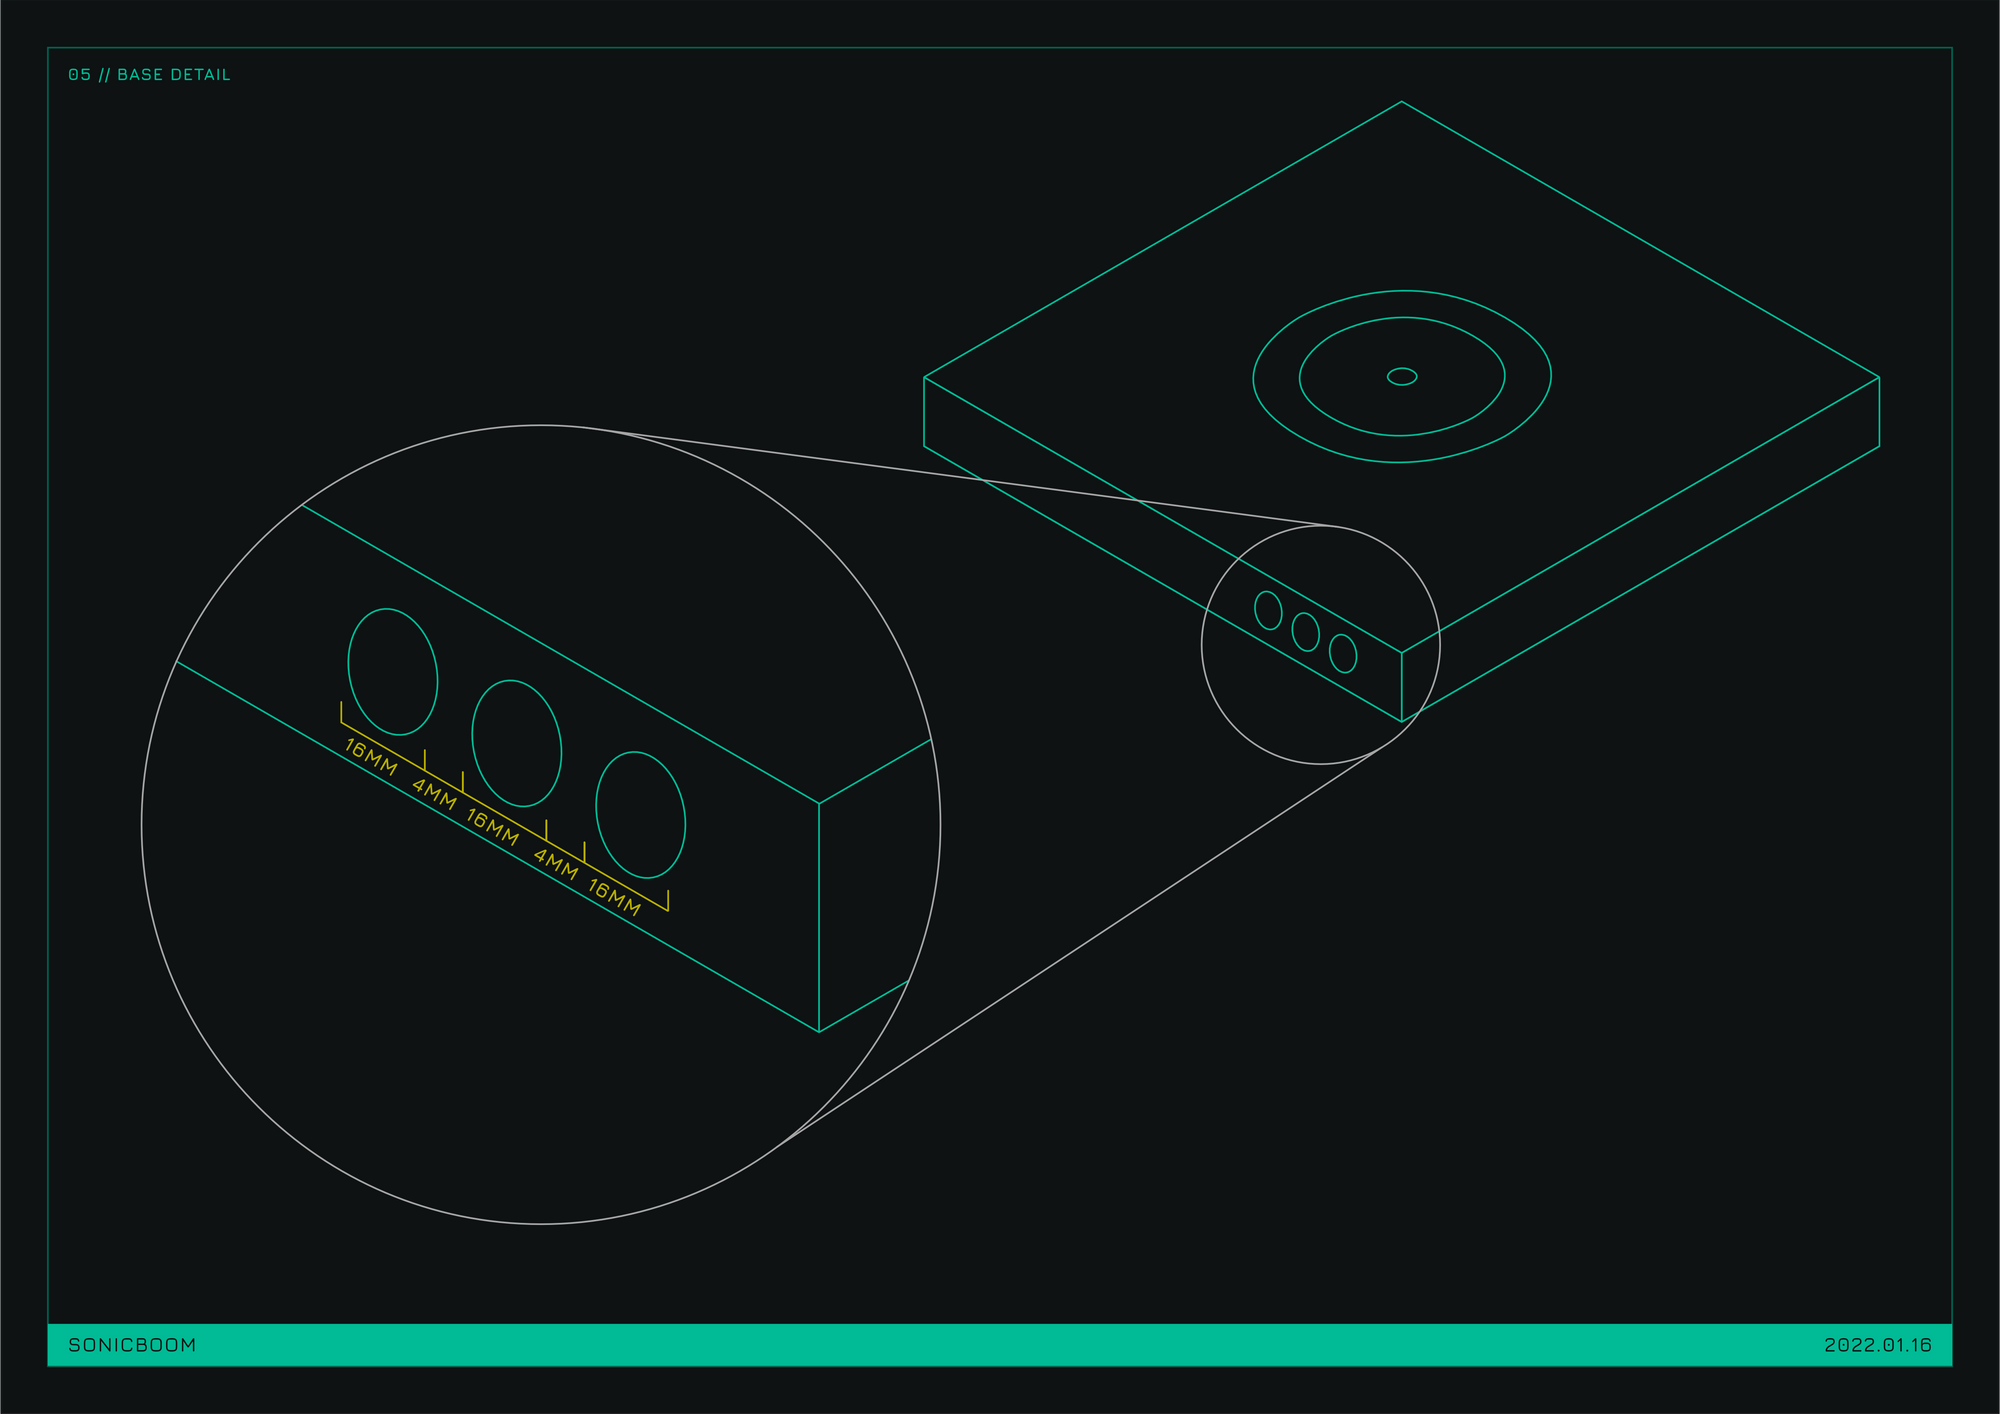
Modifying the Base
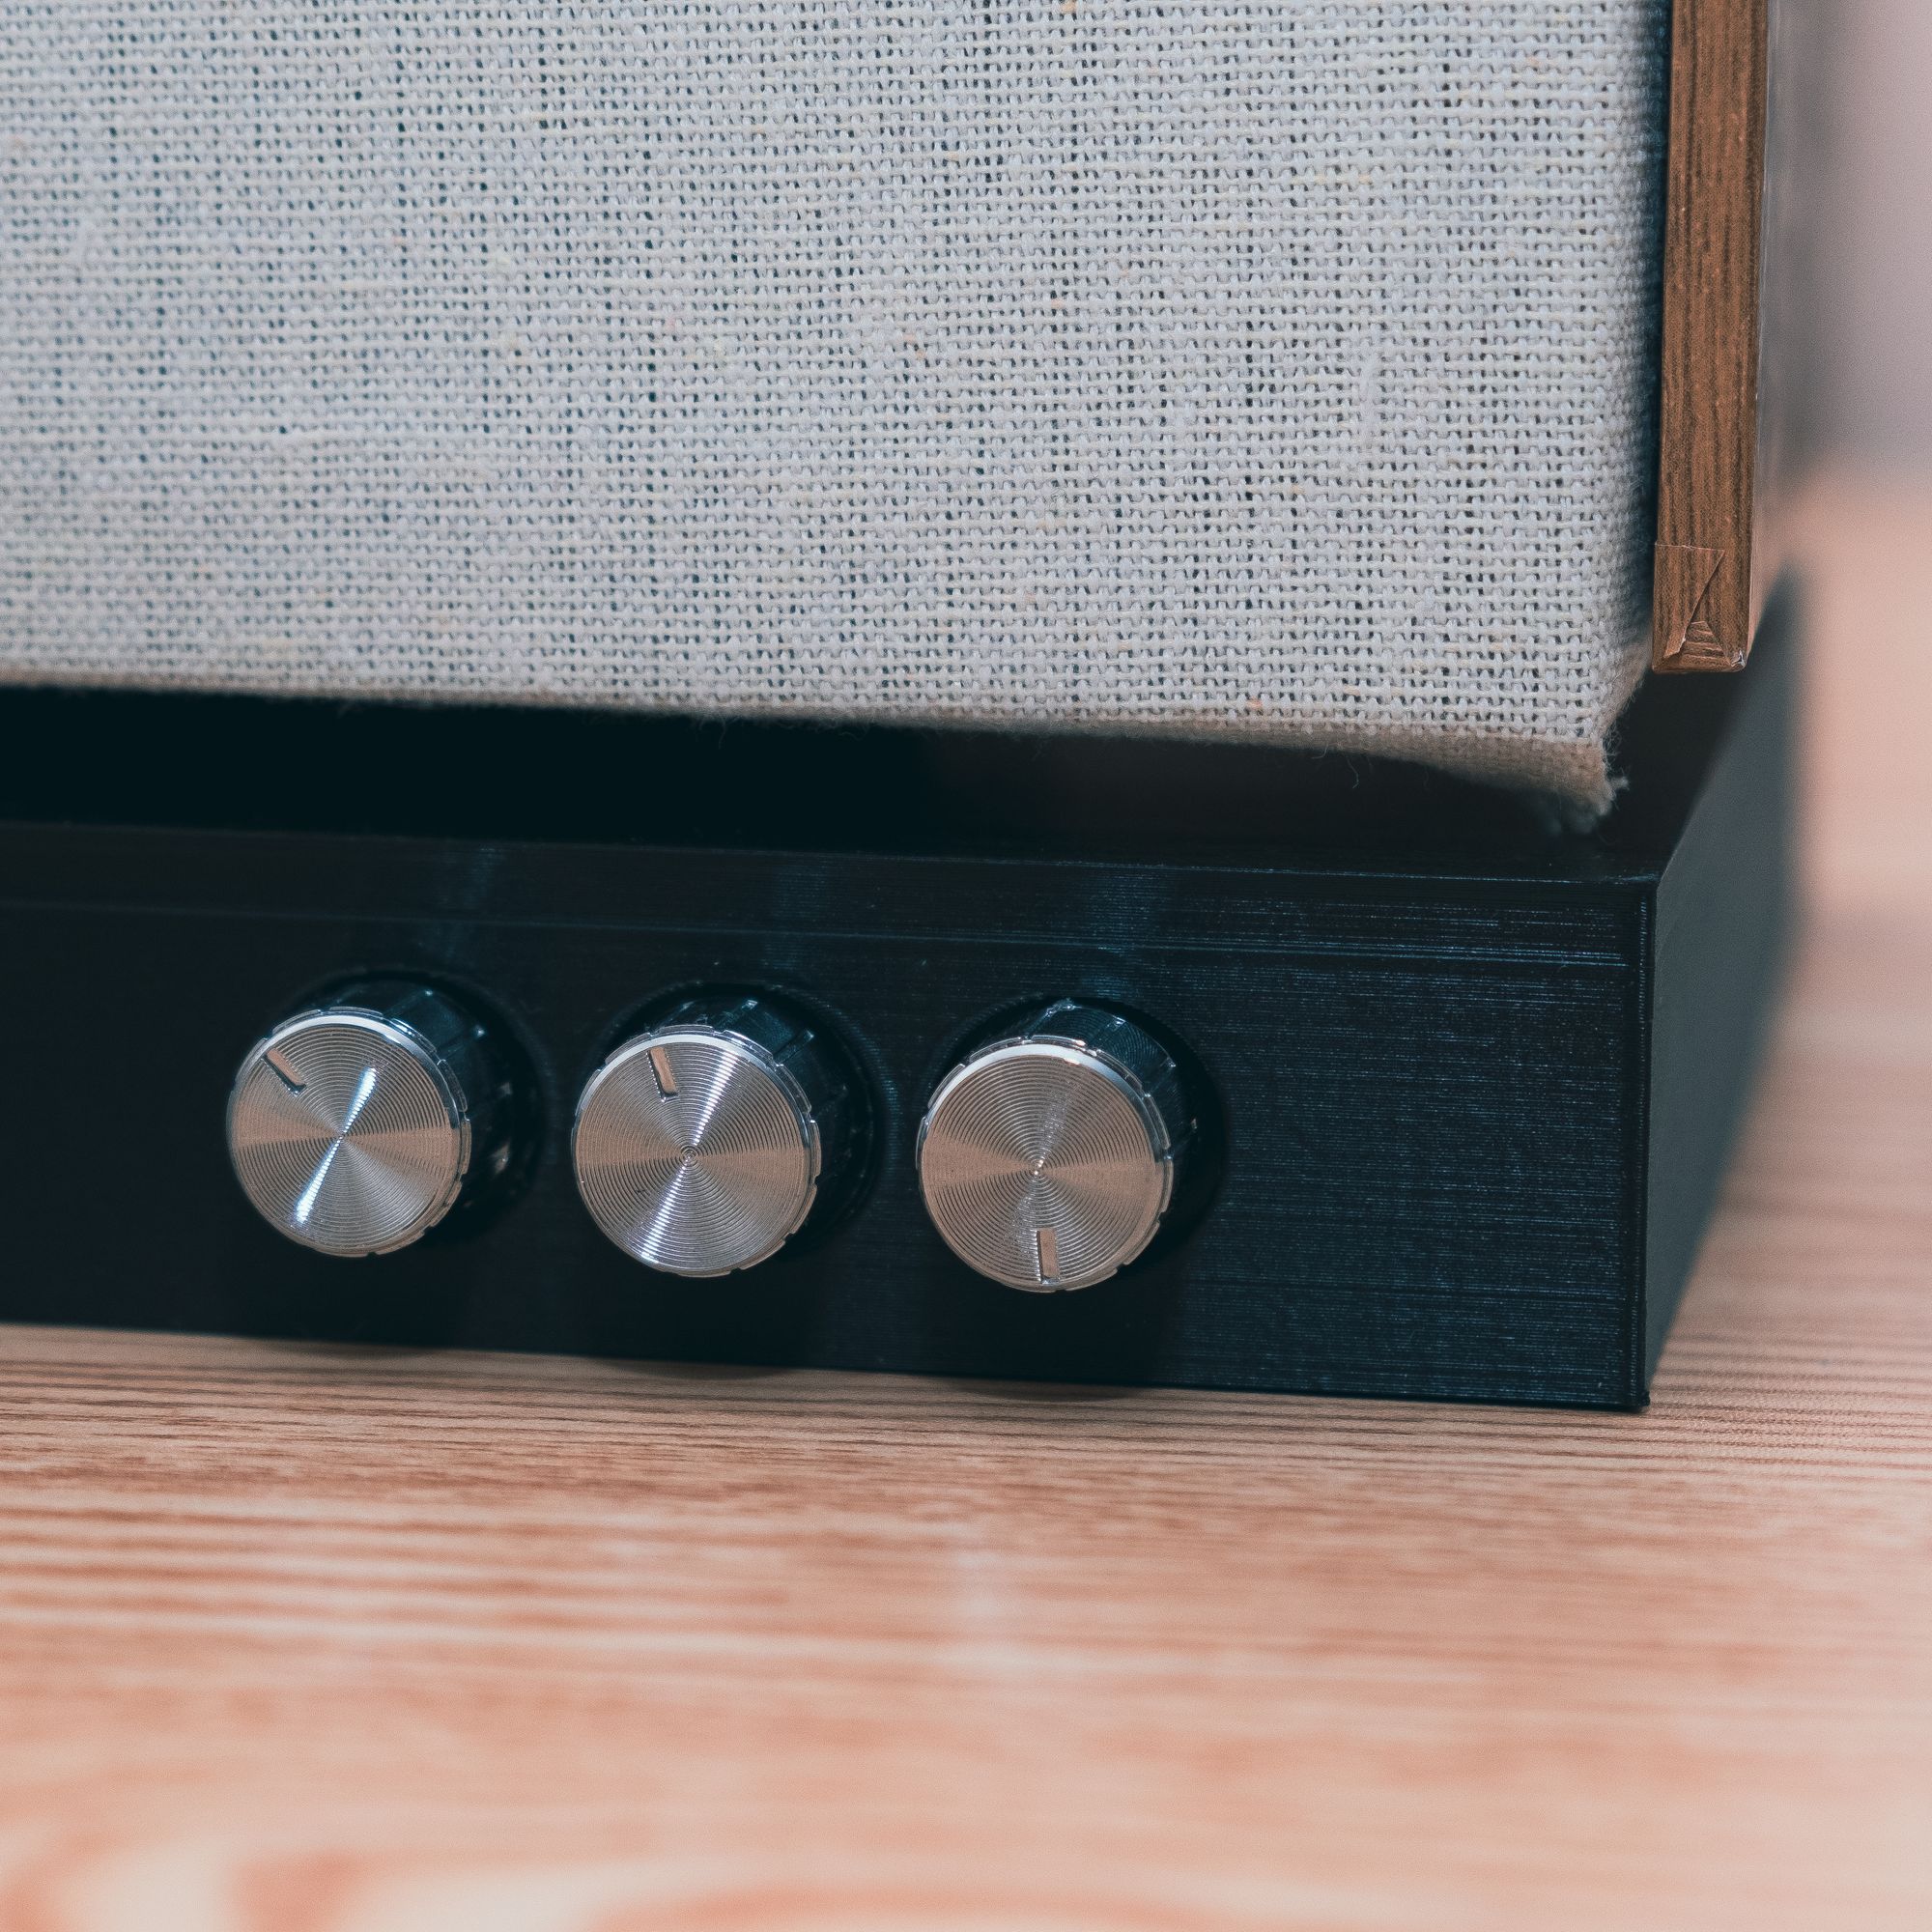
The base is designed for this amplifier which has three knobs with a diameter of 16mm with 4mm between the edge of each knob. If you're using a different amplifier, you may need to modify the 3D schematics of the speaker base.
Step 2: Produce the 3D printed parts
The speaker enclosure shouldn't require any modification other than those two pieces.
Once you've made any necessary modifications to the 3D schematics - and used a slicing tool to prepare the 3D files for printing - you can begin printing!
You'll need to print:
- 1x Speaker Base
- 1x Base to Enclosure Joint
- 1x Speaker Enclosure Bottom
- 2x Speaker Enclosure Sides
- 1x Speaker Enclosure Back
- 1x Speaker Enclosure Top
- 1x Speaker Mount Plate
- 1x Speaker Grille
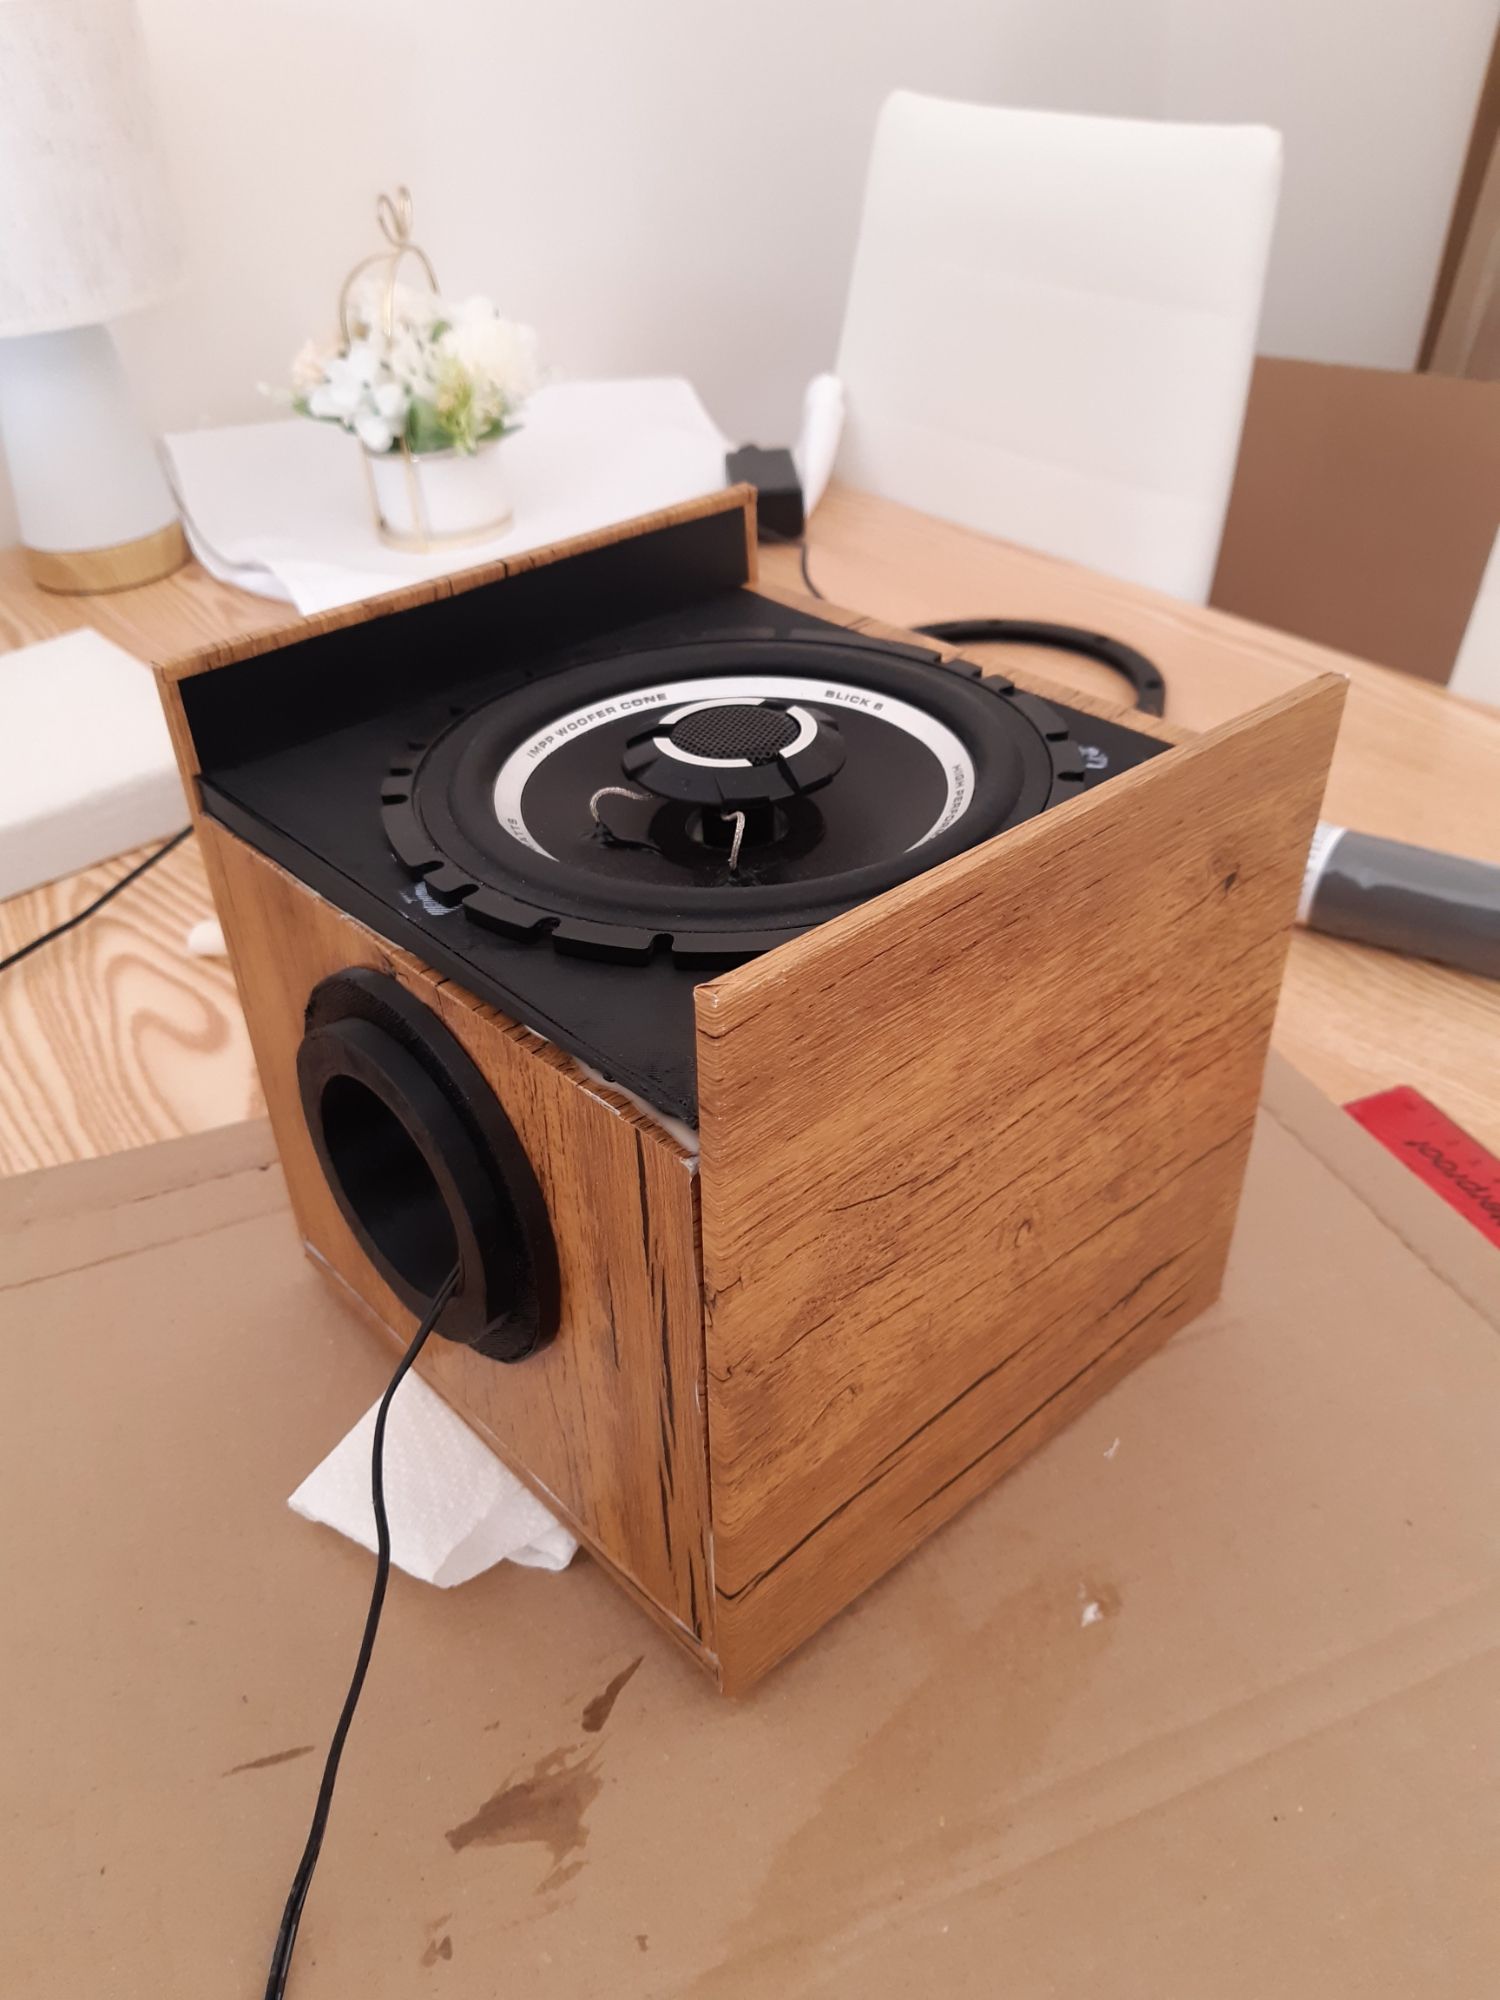
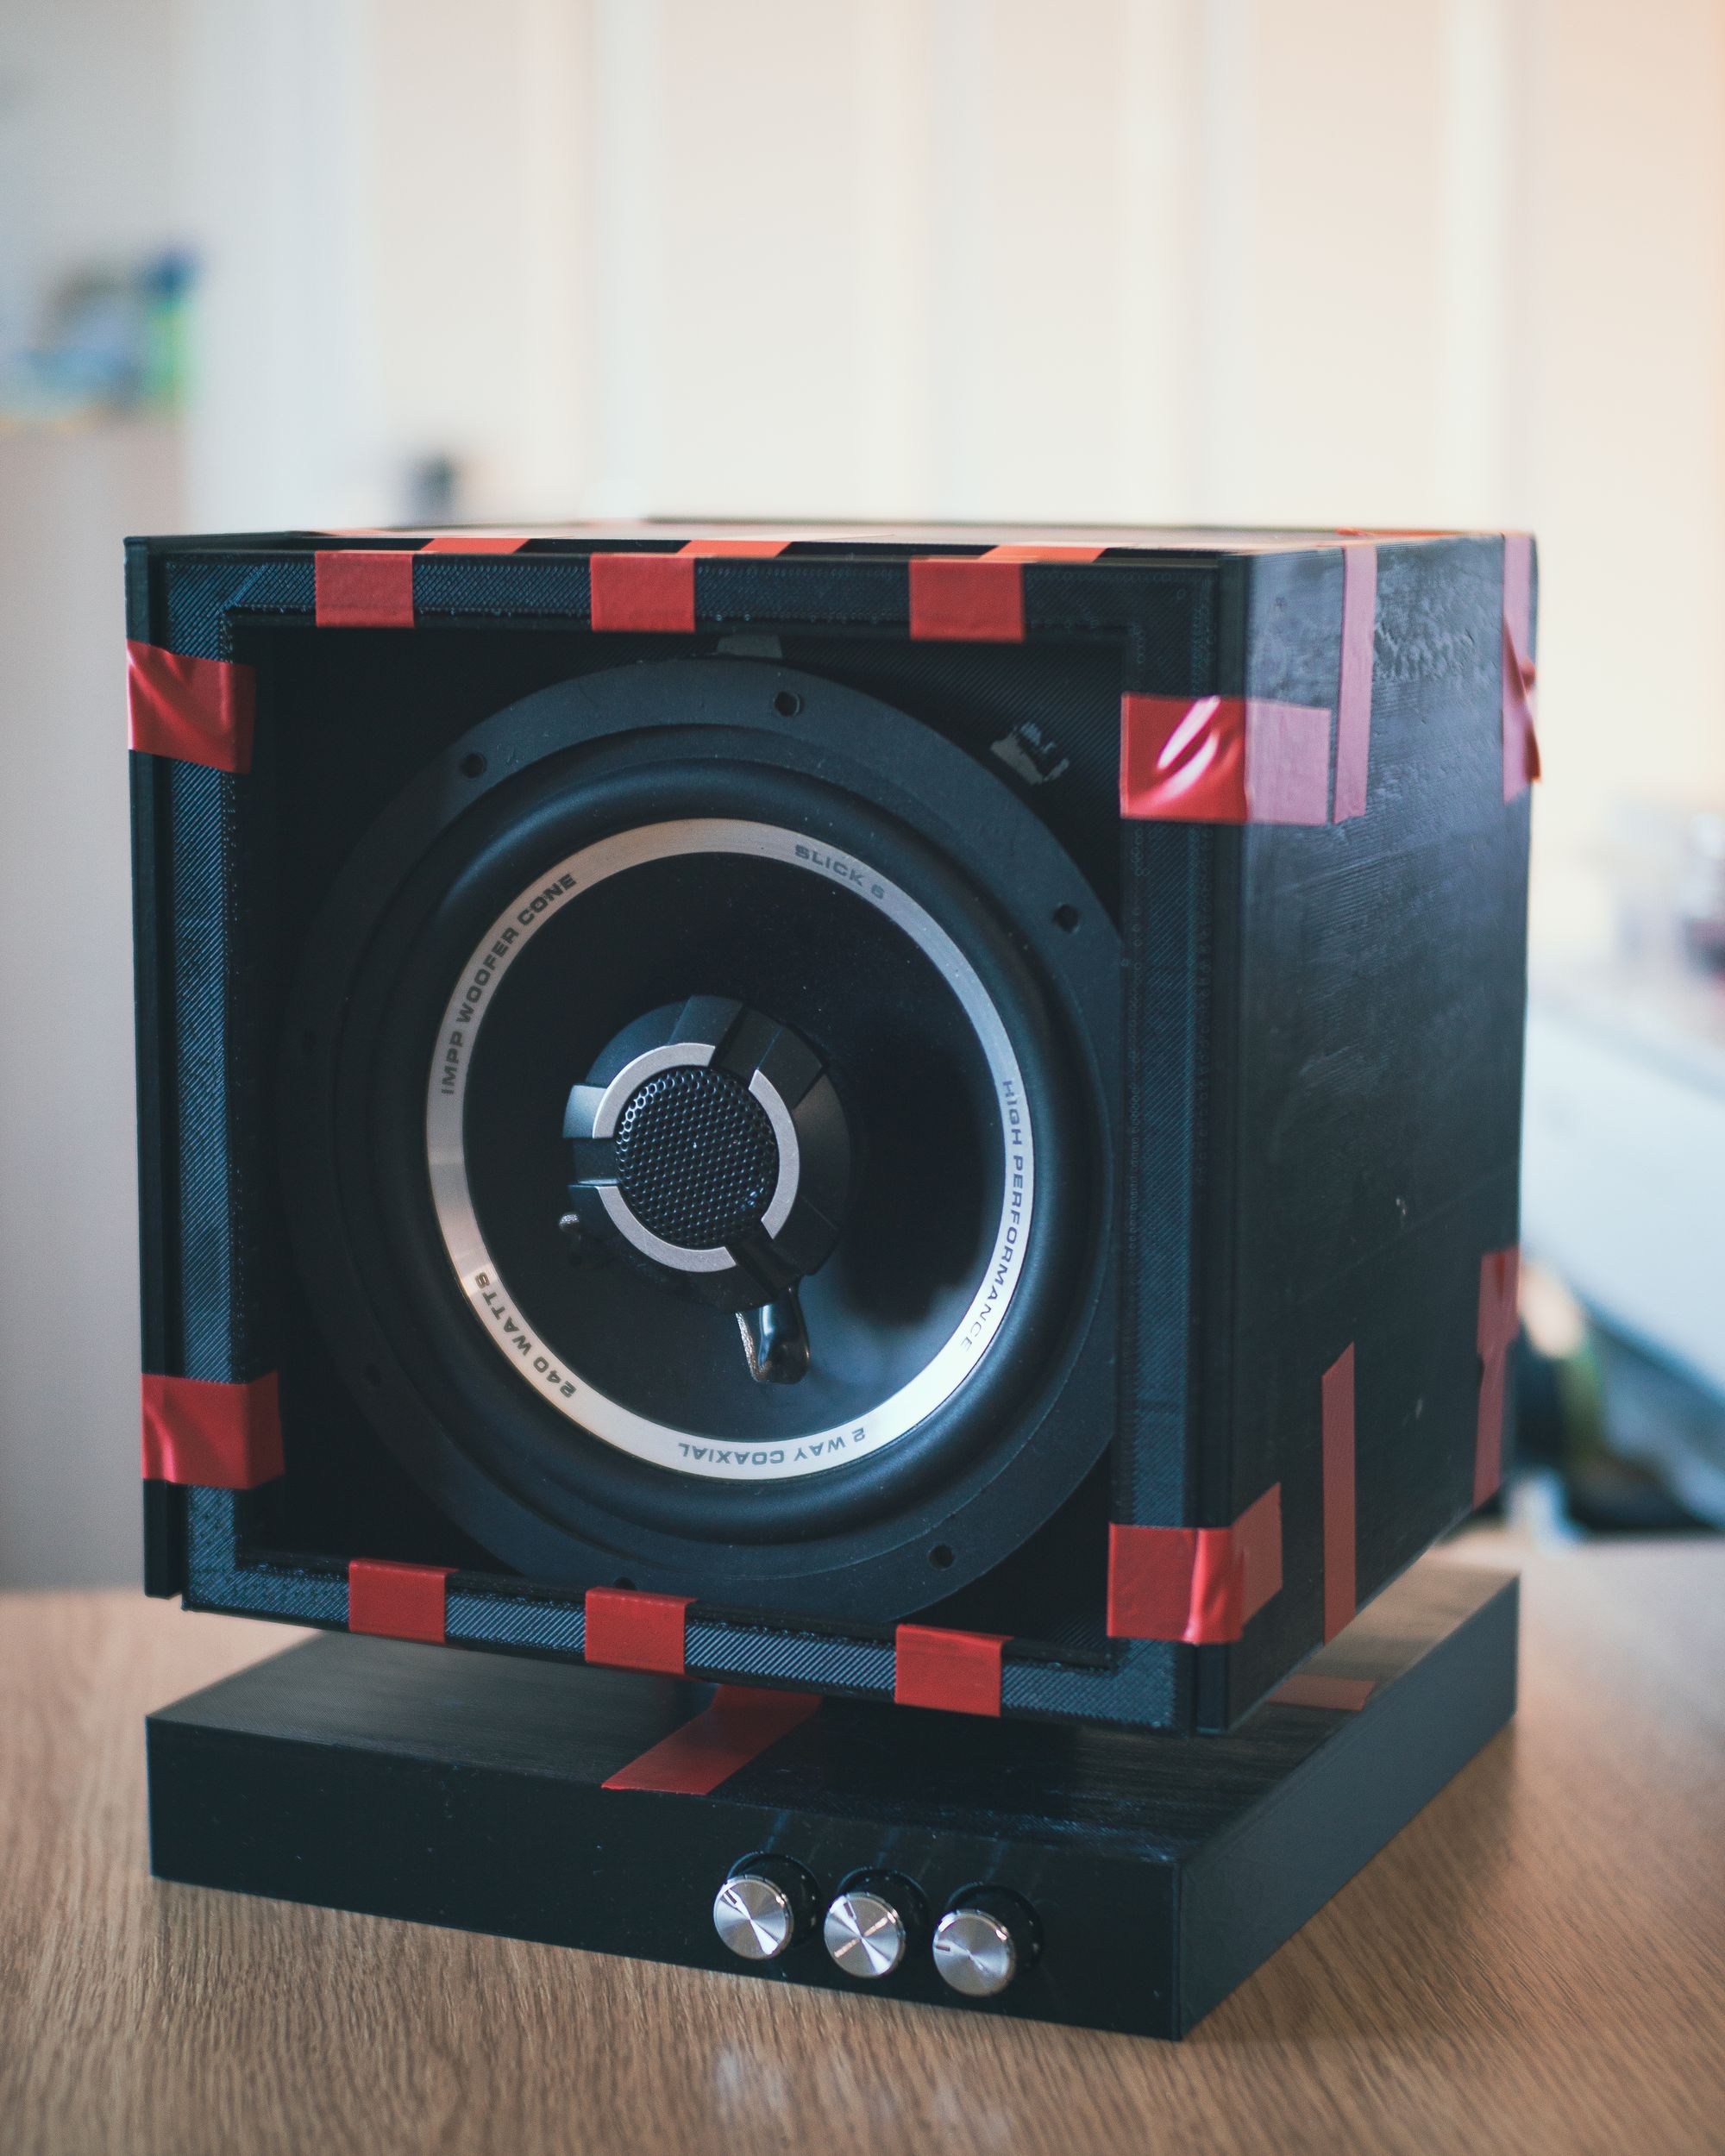
Step 3: Pre-assembly test fitting
Before doing any permanent assembly, it's best to check that all the pieces fit together correctly. I found that a bit of tape is handy for this.
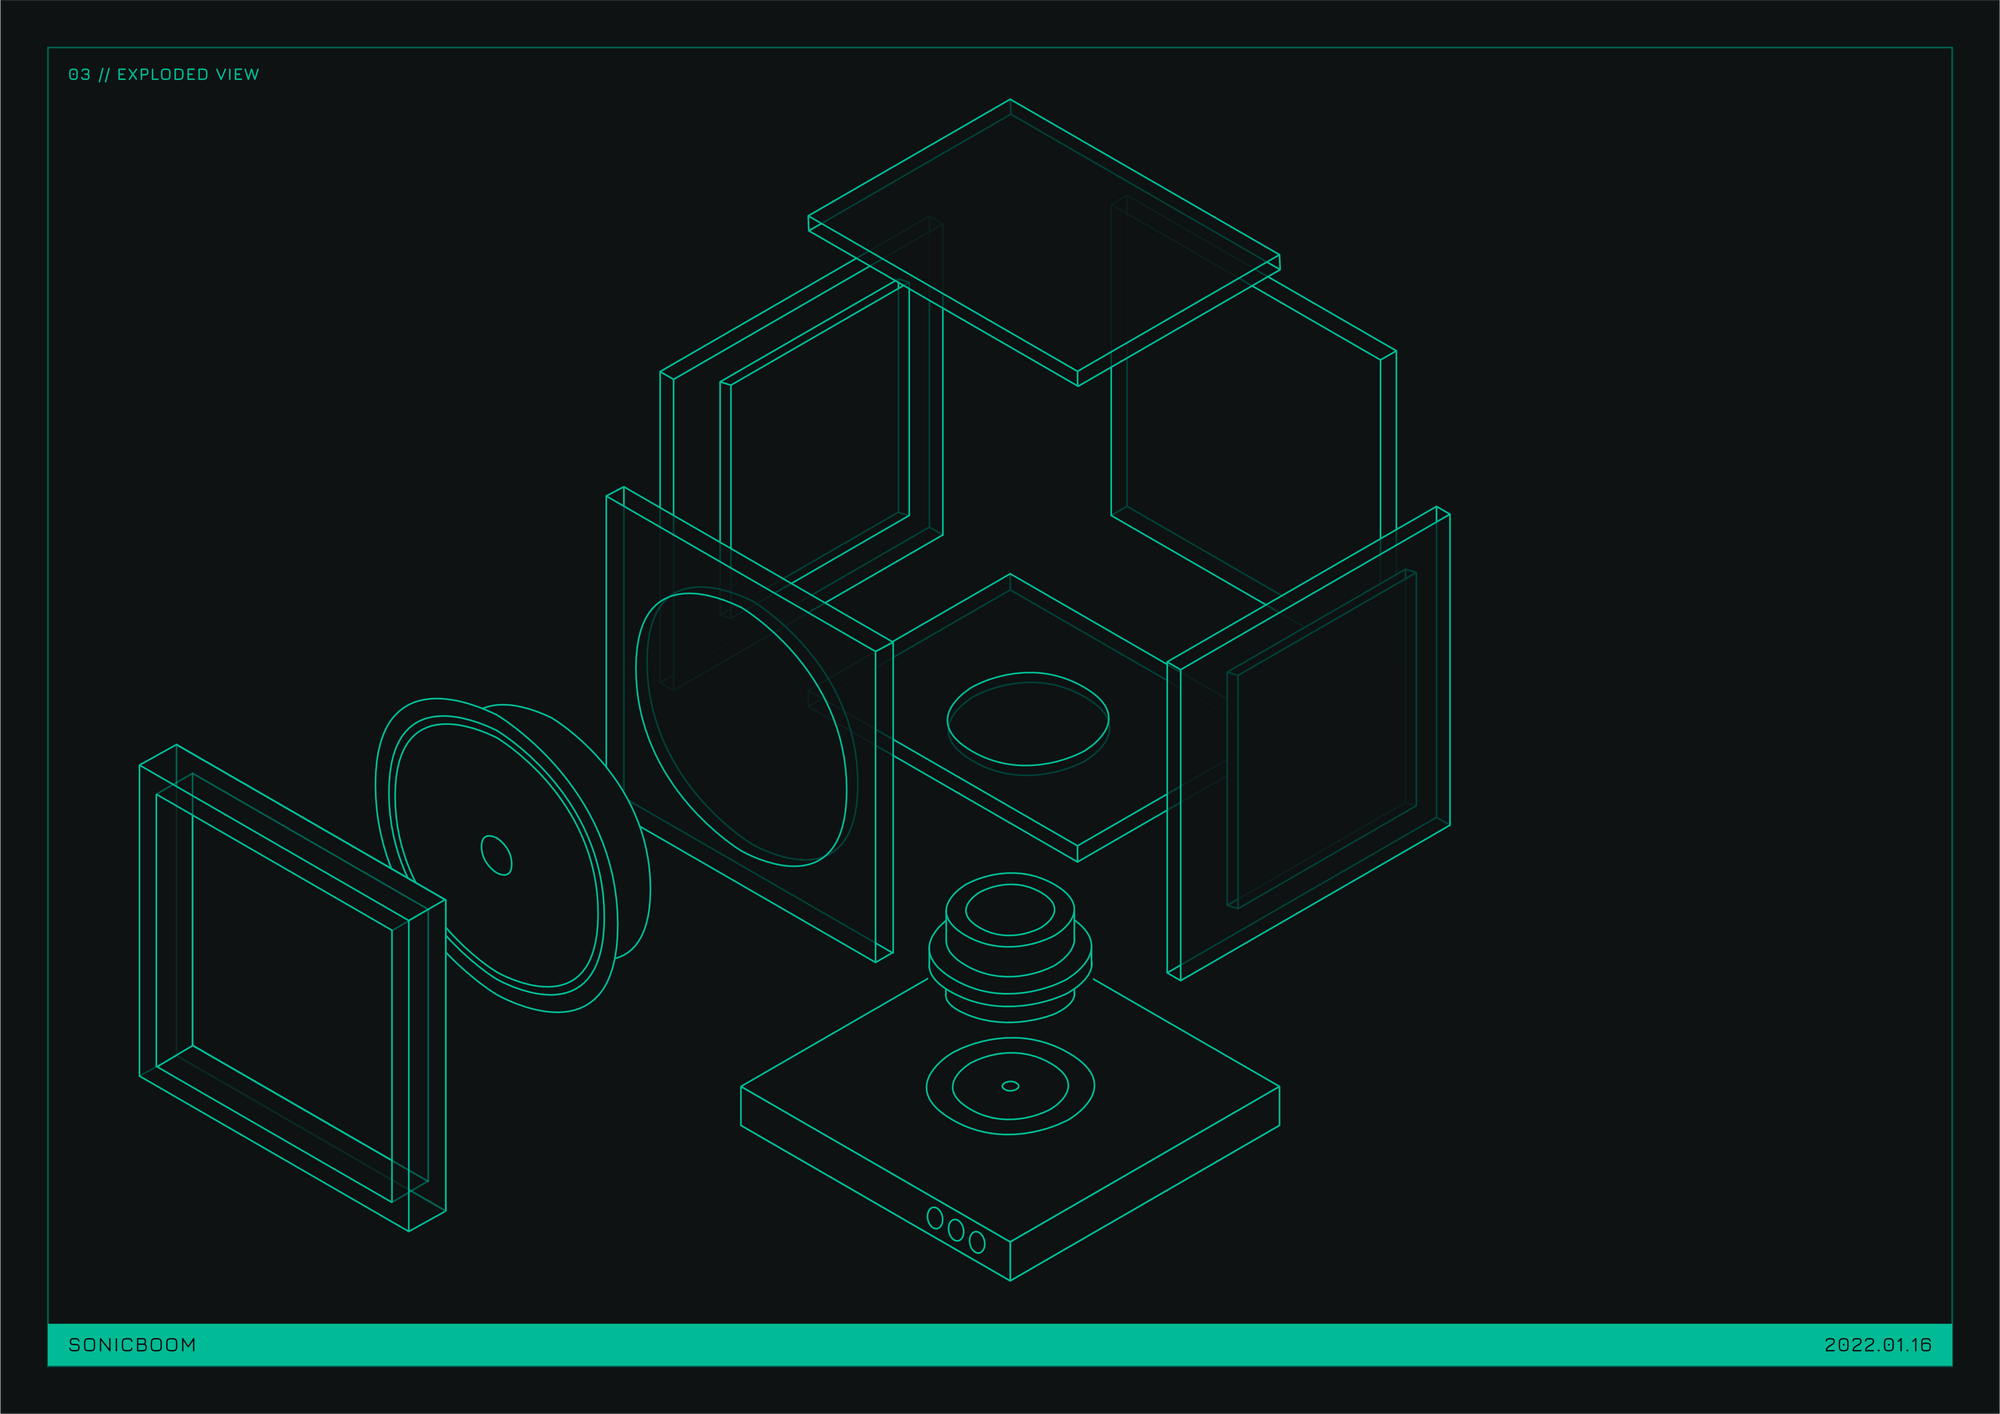
Assemble the bottom, sides, top, and back of speaker enclosure first, taping each side together and using the grooves of the sides to rest the top, bottom, and back in.
Afterwards, you should be able to slide the speaker mount plate (with speaker) into the front of the enclosure. Make sure the speaker cable is threaded through the hole at the bottom of the enclosure. Then, place the speaker grille on top of the speaker mount plate. Stick it all together with tape so it stays together.
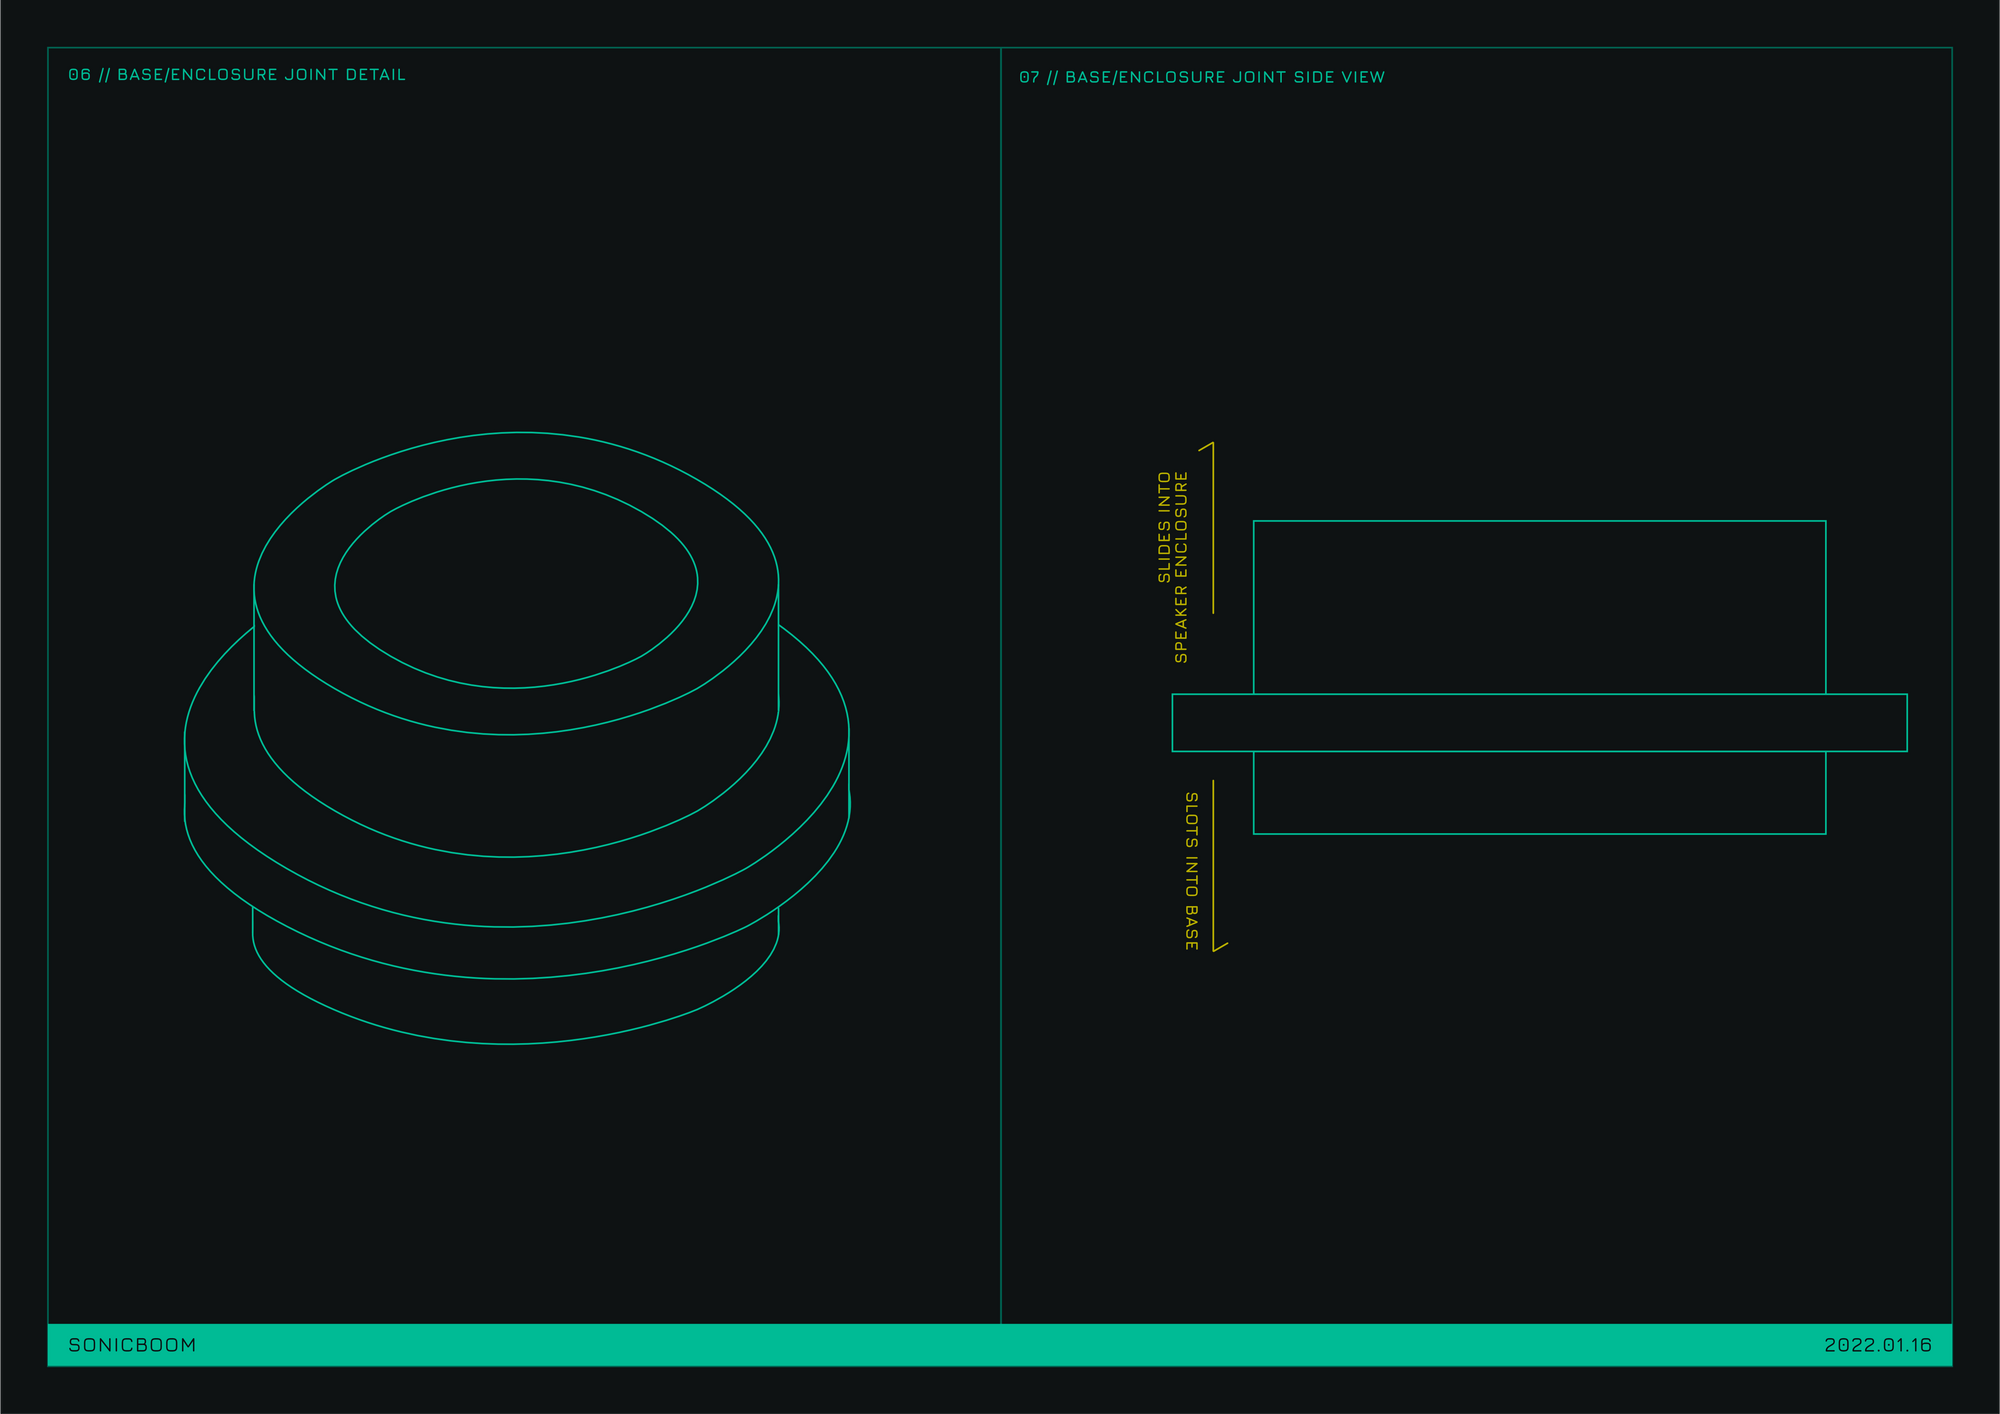
Slide the base to enclosure joint into the hole in the bottom of the speaker enclosure. The joint has a ridge that rests against the bottom of the speaker enclosure. The longer side of the cylinder should be inserted into the bottom of the speaker enclosure. The speaker cable should go through the joint.
If possible, it's easier to do this next bit with the speaker enclosure laying on its side.
Thread the speaker cable through the small hole in the base piece. Connect the speaker cable to the amplifier. Thread the power supply cable through the back of the base and connect to the amplifier. Tape the amplifier in place with the knob holes in the base.
At this point, if you have a 3.5mm extension cable to attach to the amplifier, plug it in and slot the end through the hole provided in the side of the base.
Pick up the entire speaker enclosure and place it so that the circular joint slots in to the circular groove in the base. Before everything is stuck together permanently, you may need to support the underside of the front half of the base if your speaker driver is heavy.
If you feel like it, you can also wire in the speaker to the amplifier at this point. If you have an aux cable, you can also plug that into your amp and route it so that it sits in the appropriate hole in the side of the base.
If you find that pieces don't fit together properly, you may need to make adjustments to the 3D schematics or your 3D printer settings. I found that everything fit together correctly at this point.

Step 4: Vinyl Wrap & Speaker Fabric
Now you know that everything will fit together, it's time to wrap the enclosure and base with vinyl and cover the front piece with fabric. Make sure you have vinyl that will stick to plastic and a glue that's suitable for sticking plastic together and the fabric to plastic. Follow the instructions that come with your vinyl wrap to wrap the outside pieces of the speaker.
For the fabric, cover the front cover and make sure there is enough fabric to wrap around each of the sides and the back of the cover. Glue the fabric to the back side of the cover.
Step 5: Final Assembly
The last step is to assemble the speaker permanently. This is done the same way as step three, but instead of using tape, use the glue to stick the pieces together. Use clamps to keep the pieces together while the glue dries. Don't over-tighten the clamps - if you hear crunching you've gone too far! Personally, I simply slid the front grille piece into the front of the enclosure without gluing it as I may want to replace the fabric in the future.
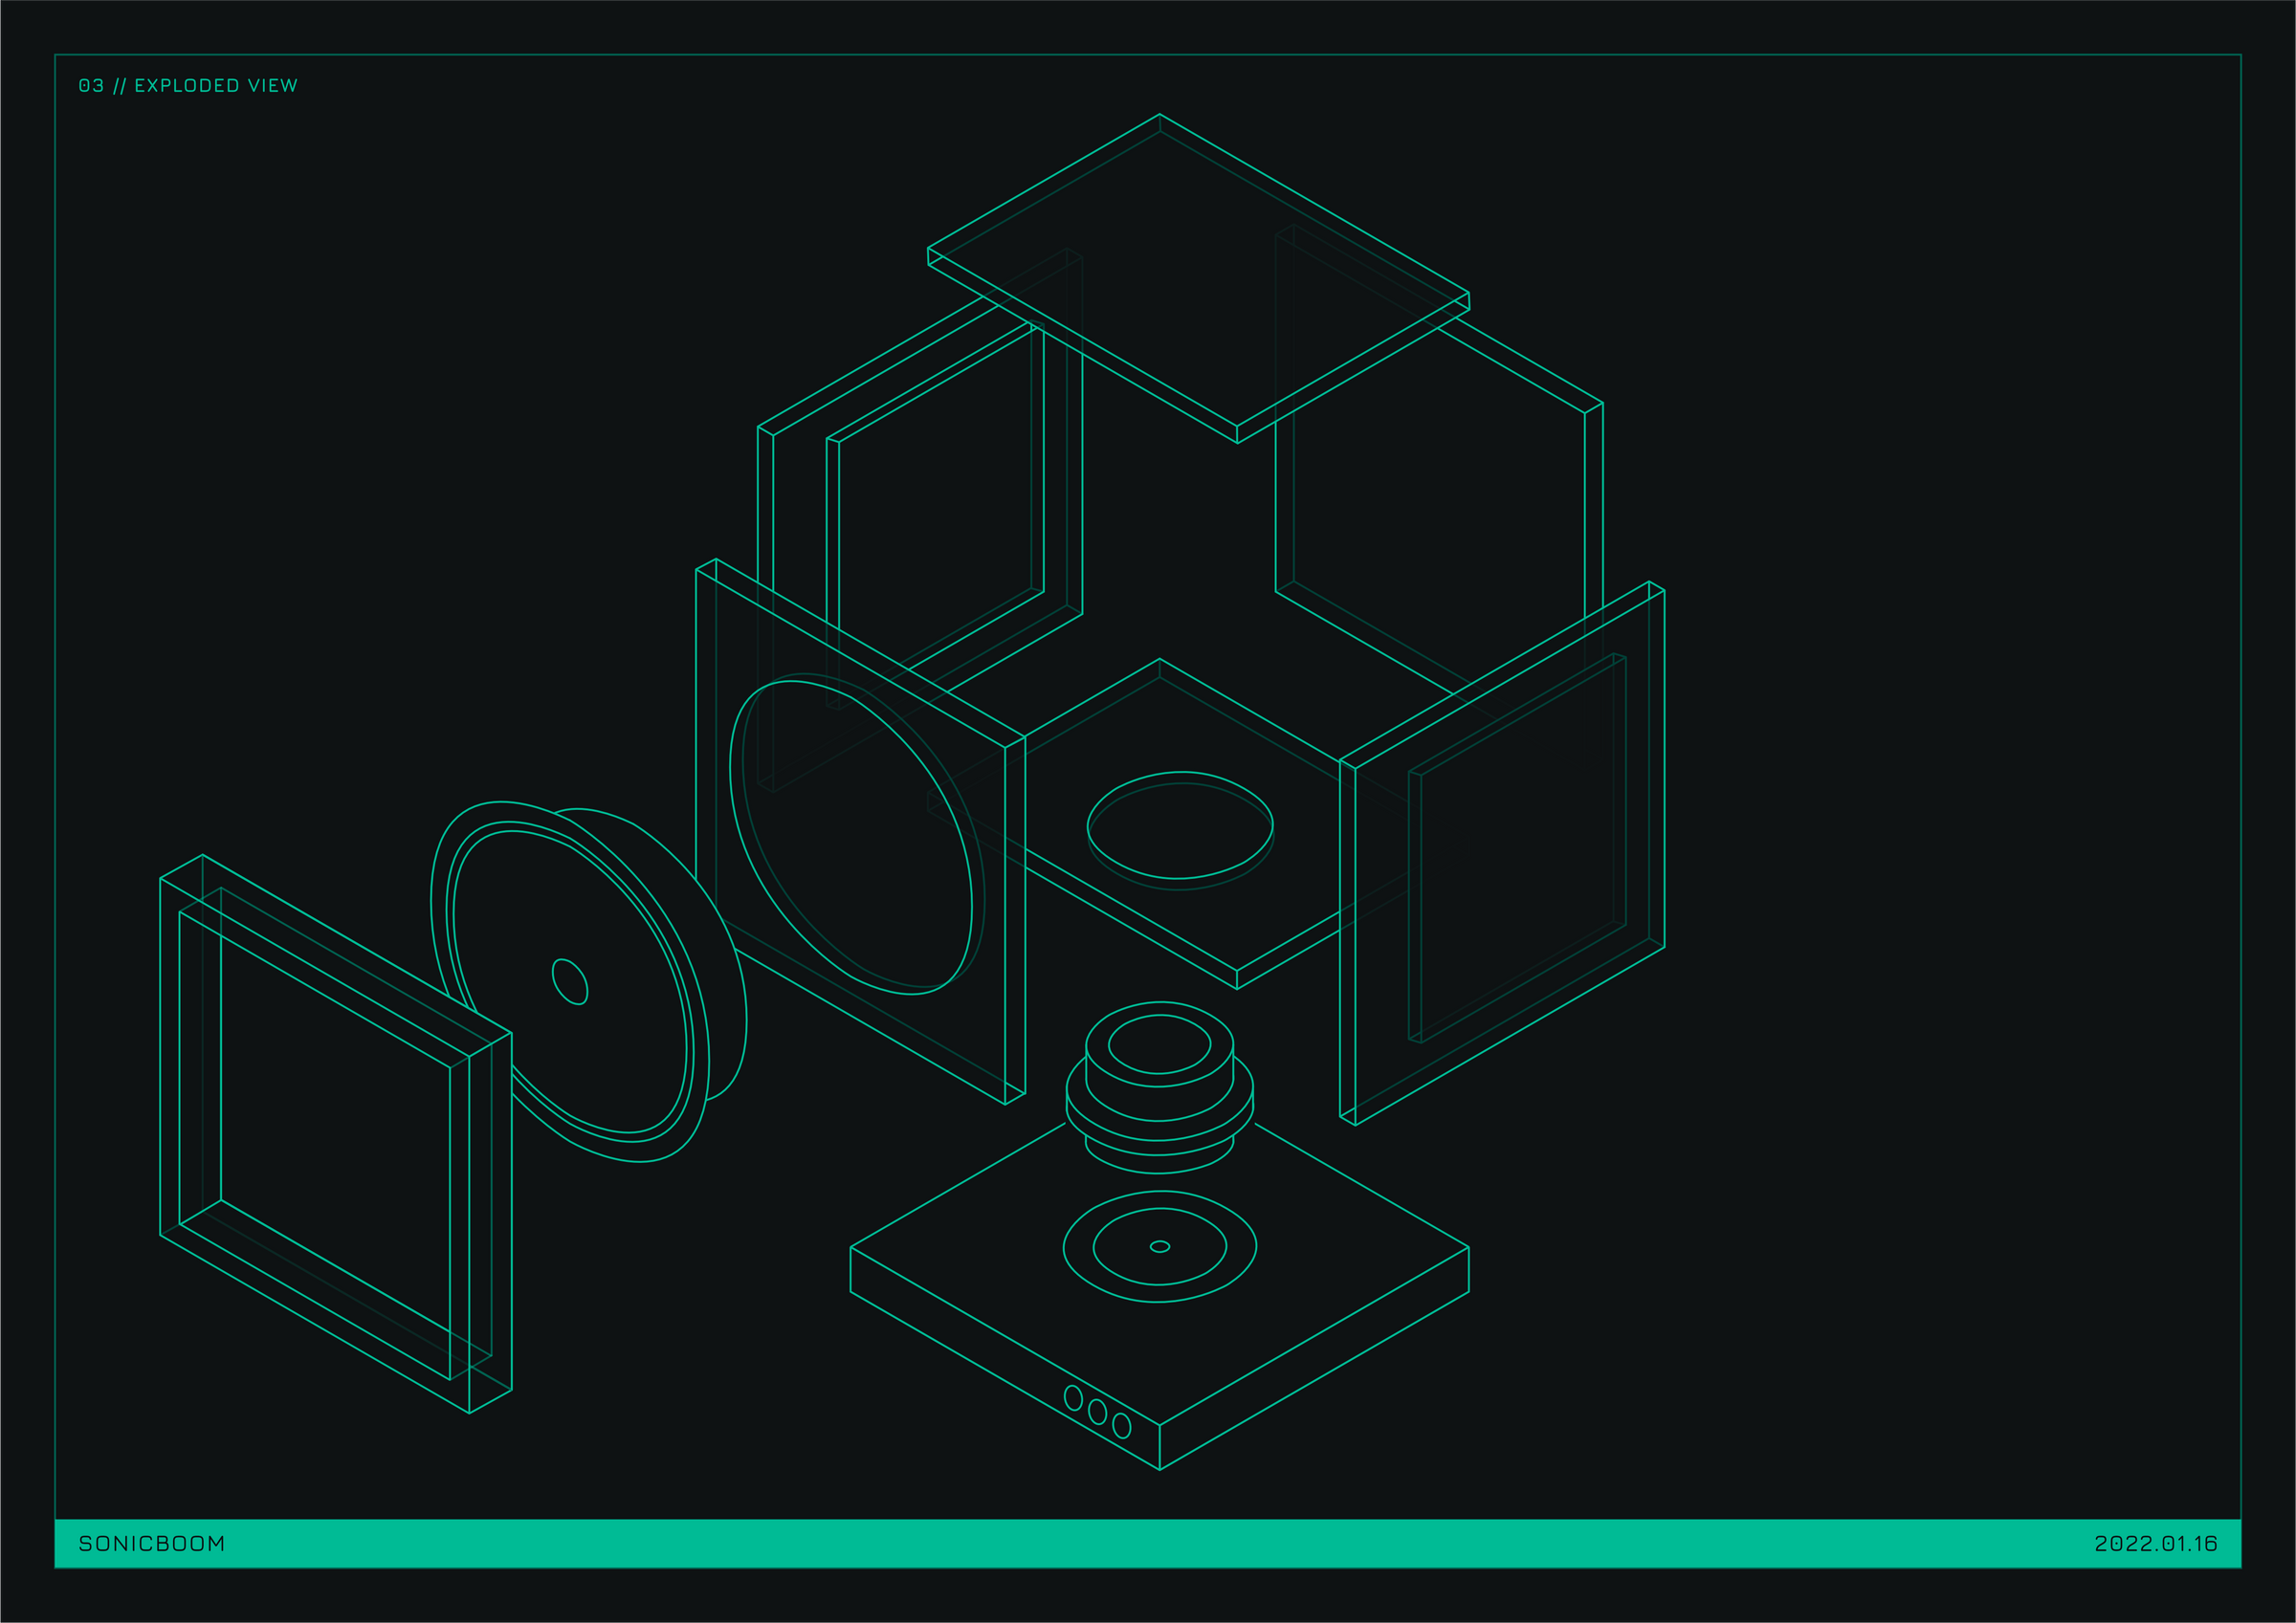
The exploded view is quite helpful to see how the pieces fit together.
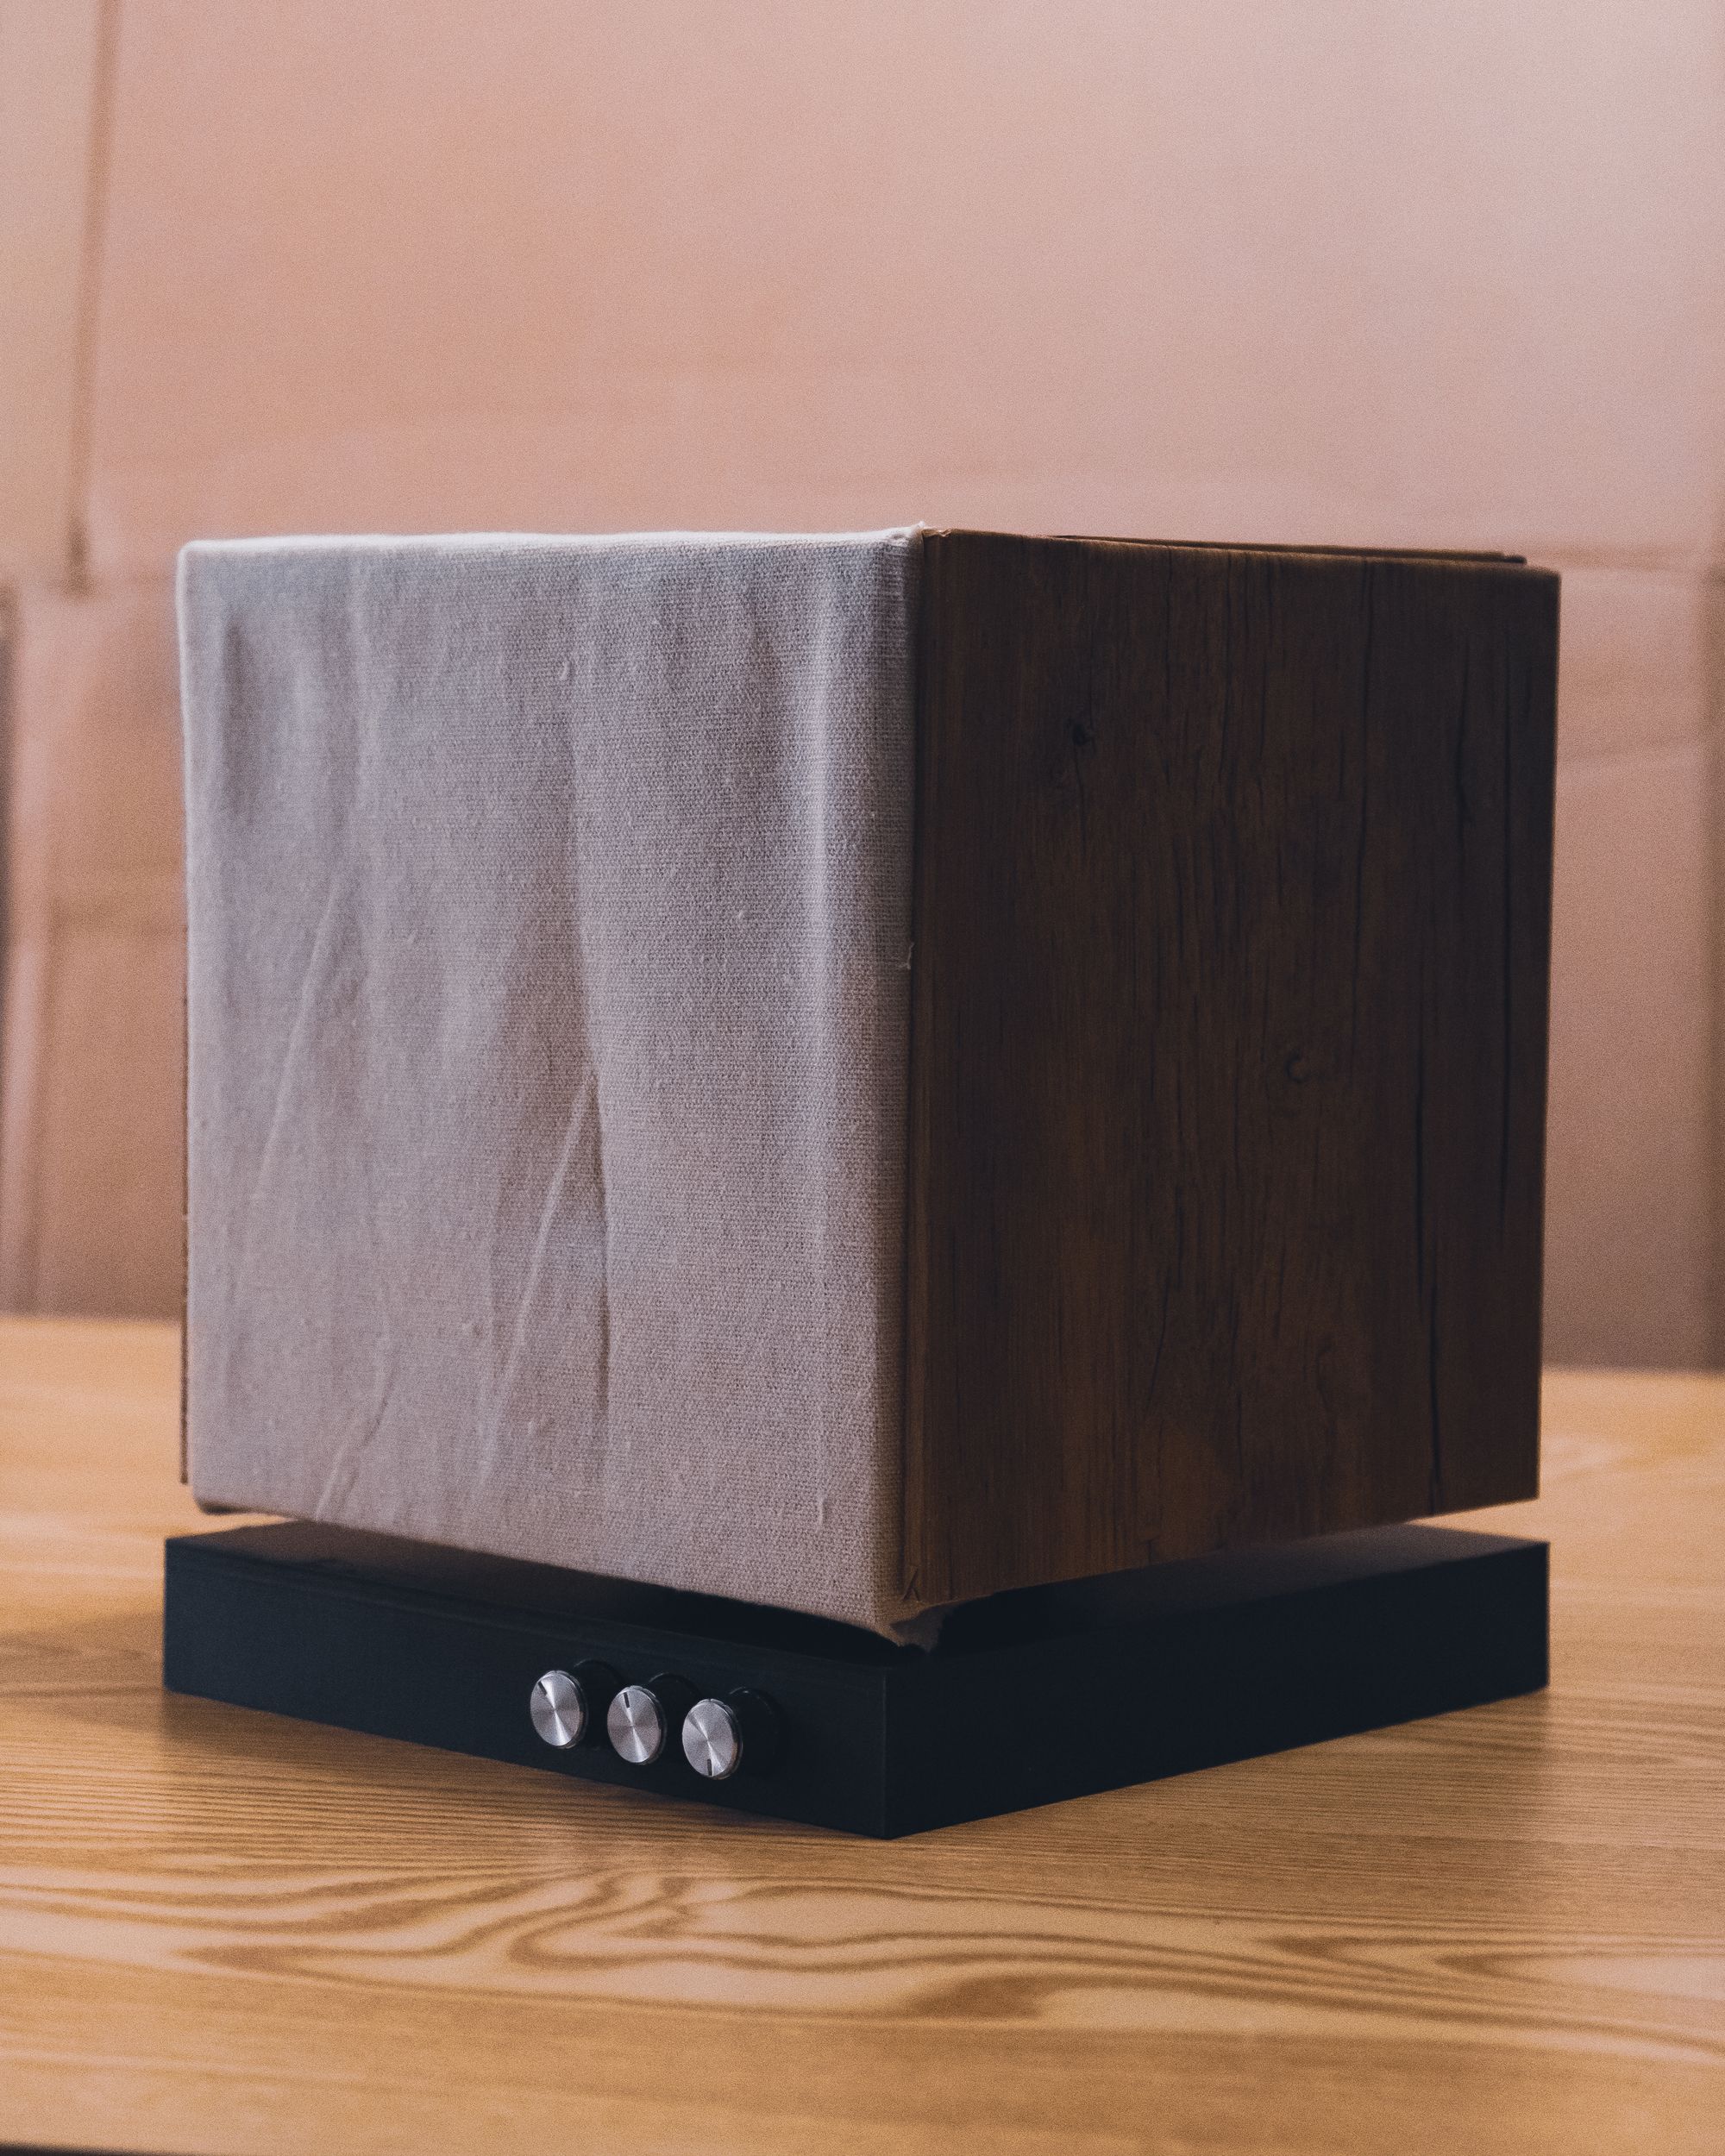
Congratulations! You've just created your very own Sonicboom speaker. Time to rock out 🎵🎶
Reference Photos

 sam [at] this domain